Showing posts with label paper. Show all posts

Friday, March 21, 2014

The Letters

While browsing around my local Jo-Ann Fabrics store, I found these very sturdy and solid, large letters of the alphabet.  They measure 8 3/4 wide x 12 inches long, perfect I thought for "rustic tinning".  I got it home, dug out my paint colors, and got to work.  I plan on buying more of these to use as accents in other rooms of my home.  They can easily be hung in groups on a wall to spell out whatever you like.  The good thing about "tinning" the letters is they do not have to match perfectly or be painted perfectly, they are supposed to look worn. This is how I did it, and how it turned out.

The letters are made of kraft paper mache and are double sided.  I used cheap black sponge brushes for the job.  I put a coat of black craft paint, let it dry then put a second coat and let that dry.  Then do the other side the same way.
 First coat of silver, and second coat of silver.  Let dry completely.  Then do the other side.
 These little bottles of paint go a long way and they are relatively cheap - .99 to $1.50 each
I was trying to find the perfect place for my C.......
I had it on a couple of different shelves...
Until I found the perfect spot for it on the mantel with the rest of my "C's".


Wednesday, January 8, 2014

How I Frost My Cakes

I made this cake for the birthday dinner, I usually make them from scratch but didn't have time with all the sauce making and meatball rolling for dinner.  I jazzed the mix up a bit with some espresso powder to enhance the chocolate flavor.  I followed the directions on the box for mixing the cake and added about 1 tablespoon of the espresso powder to the mix.  I baked it per the directions on the box, let it cool and made my Vanilla Bean Buttercream Frosting to frost it with.  This is how I frost my cakes, it always leaves the cake plate nice and clean.

Cake mix and espresso powder that I use.  Cakes cooling.
Dust off any loose crumbs on the cake, you don't want them in the frosting!
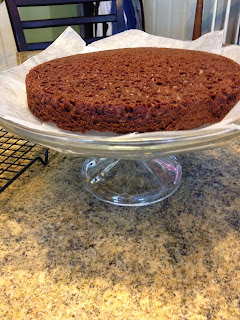
I put a dollop of frosting in the center of the cake plate, to hold the cake in place so it doesn't shift when frosting the cake.  Next, I tear sheets of waxed paper, line the outside rim of the cake plate, overlapping the waxed paper to cover the rim, so when frosting the bottom layer it doesn't get all over the plate.
Put the first layer down on top of  the dollop of frosting and press lightly on the cake so it sticks to the frosting.  Frost the top and down around the sides of the cake, covering completely.  Next, put the top layer on.  Frost the top, smoothing the frosting out, then go down the sides to cover completely.  Pull out the waxed paper sheets and you are done, the plate is clean and neat and your cake is ready for celebrating!