Thursday, February 25, 2016

Knock Your Socks Off Vegetable Hash

Who doesn't like red beets, or any kind of beets for that matter? They are so good for you, full of vitamins, antioxidants, said to lower cholesterol levels and have anti-aging effects. I love that, the anti aging thing.  I want to look younger than I am, what woman wouldn't?

So I picked up some red beets at Trader Joe's when I was there this week, wasn't sure what I would do with them.  Maybe roast them, make Harvard beets they're a favorite of mine, or boil them and use in salads for the week.  Then the light bulb finally went off in my head, I can make vegetable hash, you know like hash browns only with vegetables.  So I made the hash, and it was "knock your socks off" awesome!

Recipe below.
To print recipe, click on it, highlight and print.
To view photos in a larger format click on them.

Peel the veggies if you like, or not, and dice them along with some fresh rosemary leaves.
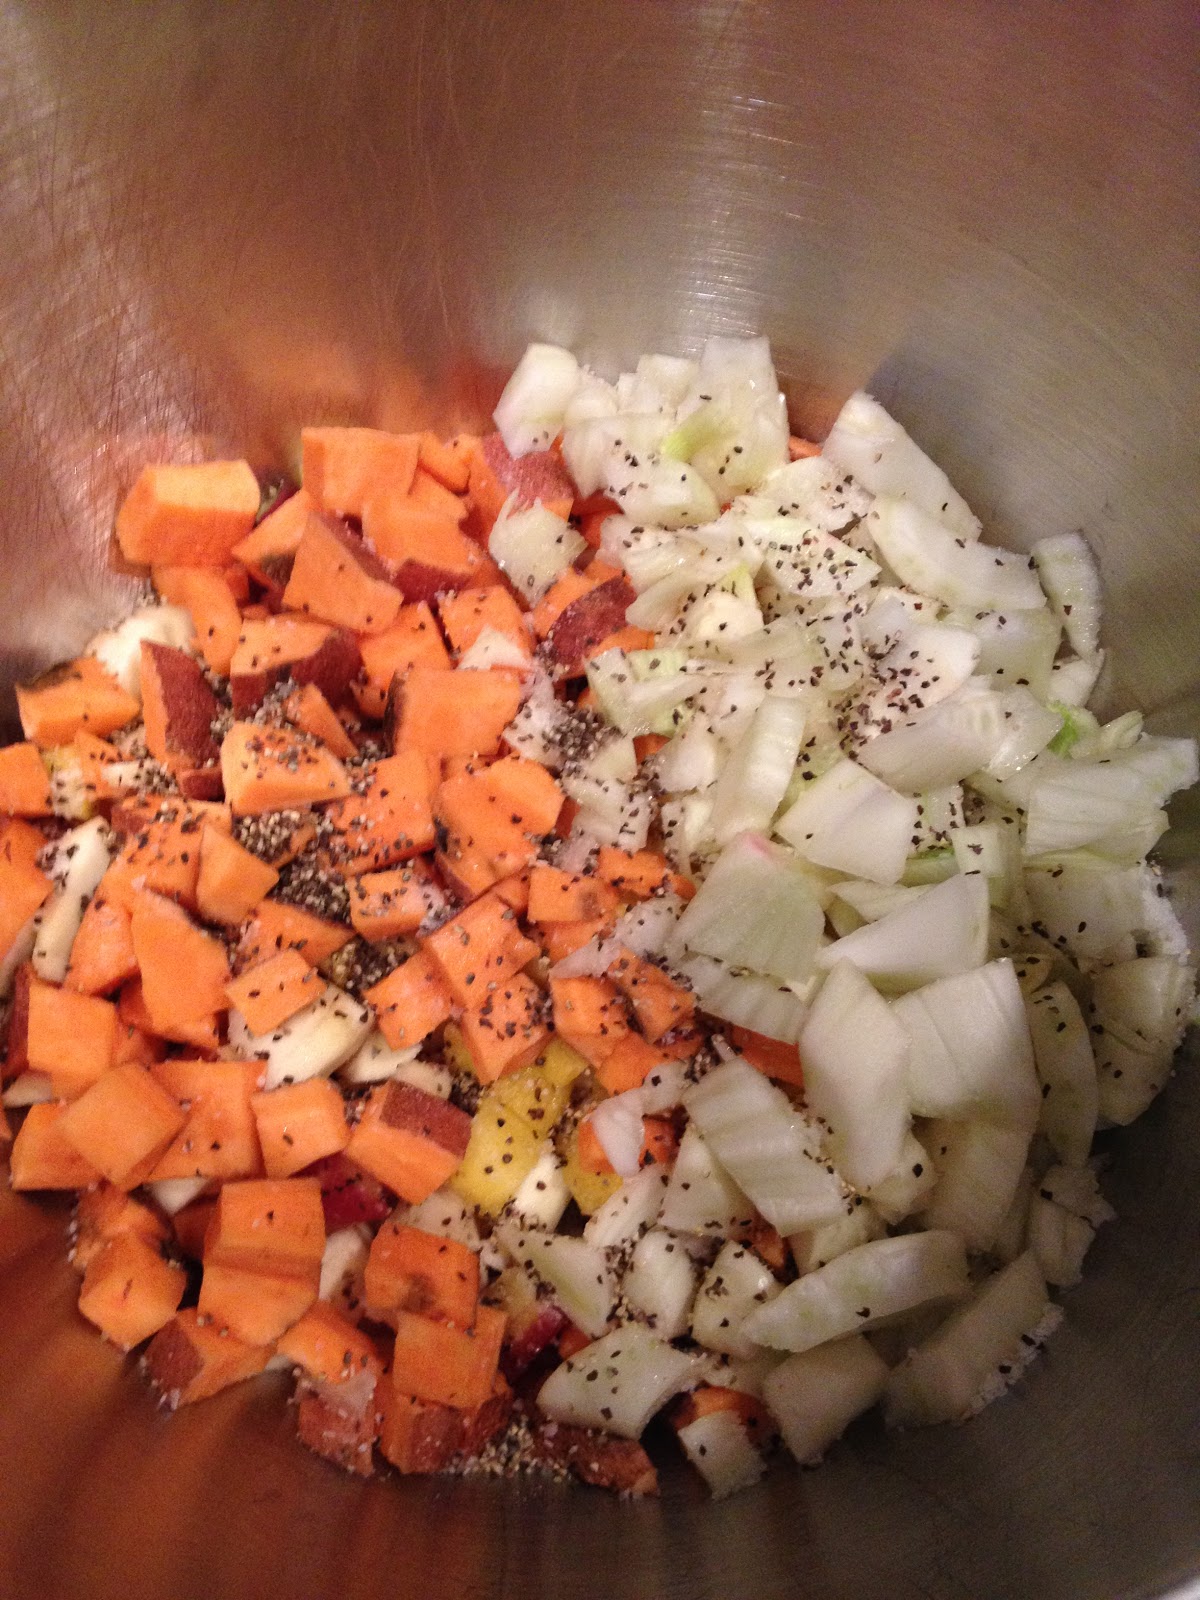
 Toss in a large bowl with a little olive oil.  Look at those amazing colors!
 Spread on a baking sheet.
 Roast at 400 degrees, turning once during cooking, and look at this beautiful, colorful dish.  Crispy, flavorful vegetables, yum!
 Vegetable Hash

Ingredients
6 red beets, peeled, medium dice, you can also you colored beets
3 medium white potatoes, peeled, medium dice
3 medium sweet potatoes, peeled, medium dice
1 parsnip, peeled, medium dice
4 carrots, peeled, medium dice, I used colored carrots - purple, yellow and orange
1 bulb fennel, cut top off, core and coarsely chopped
1/2 large onion, small dice
2 tablespoons fresh rosemary, minced
1/4 cup extra virgin olive oil
Salt and pepper to taste

Directions
Preheat oven to 400 degrees.  Toss all vegetables in a large bowl, sprinkle with rosemary.  Drizzle in the olive oil and sprinkle with salt and pepper, toss to coat.  Spread sparingly on two large baking sheets.  If the vegetables are over crowded they will steam instead of crisping. Bake for 20 minutes, turn vegetables with a spatula and bake for another 15 minutes.  For added crispness, in the last five minutes put under the broiler, be careful and watch them so they do not burn. Makes 6 servings.


Monday, February 15, 2016

Lovin' The Pasta with Beans

We have been doing a lot of vegan cooking in the kitchen so far this year, I'm liking it.  It's easy, trying different food combo's is fun, and it doesn't hurt the body to eat a little more healthy.  Now I must confess, I am not eating everything totally vegan, but the majority of  my meals and desserts are, since I have a full-on vegan living here, and he is very strict with his food.  I think his way of eating is a little over the top, but he's young, not old like me.  When you're older got to watch them bones!

 There is a lot of truth to the vegan way, he has lost a tremendous amount of weight, which I could stand to loose.  But, after all these years of eating a certain way, it's hard to give up things you like (real Pecorino-Romano cheese for one! love that stuff).  So I try everyday to cut the bad things out, and use vegan ingredients/substitutes instead, to make the dishes I like.

On the menu for Sunday night's dinner, pasta and beans, good healthy stuff.  Instead of meatballs, I used beans, and although I am not a fan of whole wheat pasta, my son had that, I made my favorite pasta,  linguine (it was protein linguine), and it was fabulous!

Recipe below.
To print recipe, click, highlight and print.
To view photos in a larger format, click on them.

A few of my ingredients.
 Getting the sauce going in the pan.....
 I love using fresh herbs.....
 Everything is combined and simmering in the pan.
 Towards the end of cooking, add the spinach and the beans, easy!
 And what you have here is a delicious, heart healthy meal, enjoy!
 I HAD to have the cheese....what's pasta without cheese?
 Pasta and Beans
Ingredients
2 tablespoons extra virgin olive oil
5 cloves garlic, minced
28 oz can of crushed tomatoes
15 oz can of diced tomatoes, drained
1/4 cup tomato paste
1/4 teaspoon crushed red pepper, more if you like heat
3/4 cup red wine
2 bay leaves
8 basil leaves, sliced chiffonade style
3 tablespoons fresh parsley, chopped
15 oz can Cannellini beans, rinsed and drained
2 cups fresh spinach, stems removed
1 pound linguine or other pasta

Directions
In a large pan over medium high heat, heat the olive oil.  Saute the minced garlic until fragrant, but do not brown it.  Add the crushed tomatoes, diced tomatoes, tomato paste, crushed red pepper, red wine, bay leaves, basil and parsley.  Reduce heat to medium, cover and let cook for 1 hour, stirring occasionally. The sauce will thicken, if it's too thick add a little bit water.

One half hour before serving, add the spinach and the beans and let cook until spinach is wilted. Start a pot of salted water for the pasta. Remove the bay leaves from the sauce before serving.  Top pasta and sauce with grated cheese, serve with crusty Italian bread. Makes 4 servings.

NOTE: If you do not like chunky tomatoes in your sauce, use an immersion blender, after adding them to the pan, to chop them up a little, or put the tomatoes in a blender before adding to the sauce. Using the immersion blender also makes the sauce smoother, creamier and gives it a silky texture.


Friday, February 12, 2016

Tastes Like Summer!

The groundhog came out of his hole on February 2nd and declared an early Spring.  Sure he did, we have had snow just about everyday since Ground Hog Day!  WHY do we put so much trust, in a furry little animal, that doesn't use any kind of weather predicting devices?  I am tired, tired, tired of this cold, frosty weather, do ya feel my pain? I need some sunshine, please!

So, after a long bout of a flu like sickness last week, I'm back in the kitchen.  I gotta keep moving, trying to keep warm.  I made an after dinner dessert last night, hopefully to remind me of the warmer weather that will soon be in our forecast.  I needed a little of my own sunshine, and to refresh me a little, I made a Strawberry Tiramisu with a hint of lemon, that I know will get me thinking of Summer, the hot sun, being outside without a parka on, or bundled up with gloves, a blanket, scarf, boots, a hat........you get the picture, uh huh.
Recipe below.
To print recipe, click on it, highlight and print.
To view photos in a larger format, click on them.

A few of my ingredients.
 I used an 8 oz container of mascarpone cheese and 4 ounces of regular cream cheese.  Chopped a few strawberries for the cheese mixture.
 Made my own whipped cream, it's cheaper and you can flavor it anyway you like.  Used vanilla bean paste to flavor mine.
It only takes a few minutes, so be careful you don't want to churn it into butter by over mixing it.
 PERFECT!
 Gently fold half into the cream cheese mixture and reserve half for topping.
 Split the ladyfingers and layer in the bottom of a baking pan.  I used a palette knife to spread the cheese mixture it's much easier than a spatula.
 First layer of ladyfingers and cheese mixture.
I sliced up about 8 large strawberries to top the cheese mixture.  Another layer of ladyfingers, more cheese and any remaining strawberries.
 Used a pastry bag with a fitted tip and went all around the edges and in between all the berries, to top the whole tiramisu with whipped cream.  Garnished with a large sliced berry on top, as well as some grated lemon zest.
A slice of Summer, I feel better now!
 Strawberry Tiramisu
Ingredients
8 oz. container mascarpone cheese, room temp
4 ounces regular cream cheese, room temp
3/4 cup confectioner's sugar
1 teaspoon lemon juice
1/4 teaspoon lemon zest
1/2 cup chopped strawberries
2 - 3 oz packages ladyfingers
2 cups heavy whipping cream
1/2 teaspoon vanilla bean paste or 1 teaspoon vanilla extract
1/4 cup confectioner's sugar
8 large strawberries, sliced (see note)
1/2 teaspoon lemon zest
1 large strawberry for garnish

Directions
In a large mixing bowl, beat the mascarpone cheese and cream cheese until well combined.  Add the 3/4 cup of confectioner's sugar, 1 teaspoon of lemon juice, 1/4 teaspoon of zest, blend.  Fold in the chopped strawberries, set aside.

Split the ladyfingers in half, and make one layer of them in the bottom of an 8 x 8 baking pan, set aside. Reserve the other ladyfingers to complete the tiramisu. 

In a medium mixing bowl, pour in the heavy cream, vanilla and 1/4 cup of confectioner's sugar. Beat on high, until stiff peaks form, do not over beat, it will turn to butter, not good.  This should be light and fluffy with the consistency of whipped cream, not cream cheese. Reserve half of the whipped cream, put into a bowl and refrigerate. With a spatula, lightly fold the other half into the cheese mixture.

Layer half the cheese mixture over the ladyfingers, top with sliced strawberries.  Repeat with the remaining ladyfingers, cheese mixture and strawberries.  Right before serving put the whipped cream into a pastry bag and pipe onto the top of the tiramisu.  Top with the large strawberry and lemon zest to garnish. Makes 6 servings.

NOTE:  You could also use frozen berries, or frozen berries in syrup.  I used fresh berries for a fresher taste.

Tuesday, February 2, 2016

Vegan Coffee Buns

You know when I eat "the sweets", "the sweets" do bad things to me.  I like "the sweets", so I have to come up with better ideas of how to make them homemade, without giving up texture and taste.  One of my favorite breakfast sweets is sticky buns, love them!  I WILL eat the whole pan when presented right out of the oven.  Hot, warm, gooey sticky buns, mmmmmm, are so good!  I have no control, seriously, I need to just stop eating altogether.

So to "replace" my favorite sticky bun recipe, I came across an old recipe that I used to make a long, long time ago and turned it vegan, yes that's right, VEGAN.  AND they are fabulous, AND no taste or texture is compromised.  I'm calling them Vegan Coffee Buns, but you can eat them any time you like. Check them out!

Recipe below.
To print recipe, click on it, highlight and print.
To view photos in a larger format, click on them.

Who knew Bisquick was vegan, not me! A few of my ingredients to start my buns.
 All you need is the baking mix and the banana for the dough.
 Mix it up....
 Form into a ball and turn out on a dusted surface.....
 Roll it out....
 Brush on melted vegan butter........
 Brown sugar and cinnamon....
 Roll it up and slice it down....
 Melted vegan butter and pecans or any kind of nut you like....
 Pop those sliced rolls on top.....
 And bake!
 Flip them out of the pan and onto a baking sheet, don't want to loose any of the gooey stuff.
 Ahhhhh, look at these delightful, tasty, sweet little treats, and no guilt.
 Vegan Coffee Buns

Ingredients
For the topping
1/2 cup Earth Balance vegan butter, room temp
1/4 cup light brown sugar
36 pecan halves (see note)

For the dough
2 cups Bisquick baking mix
3/4 cup mashed ripe banana

For the filling
3 tablespoons Earth Balance vegan butter, melted
1/4 cup light brown sugar
1/2 teaspoon cinnamon

Directions
Preheat oven to 400 degrees.  Cut the 1/2 cup butter into 24 pieces. Place two pieces in each cup of a 12 cup muffin pan.  Sprinkle 2 teaspoons of brown sugar in each cup, and top with 3 pecan halves. Place in the oven to melt the butter, watch it carefully it will not take long. Remove from oven when butter is melted and set aside.

With a spatula blend together the baking mix and the banana.  When all is combined form into a ball, and turn out onto a flat surface dusted with baking mix.  Knead the dough a few times.  Dust the surface again so dough does not stick, shape the dough into a rectangle.  Dust the top with a little more baking mix and roll with a rolling pin into a larger, flatter, even rectangle.

Melt the 3 tablespoons of vegan butter in the microwave for a few seconds. Spread the butter with a brush onto the rectangle, sprinkle with the 1/4 cup brown sugar and cinnamon.  Roll up from the long end of the dough.  Seal the edge tightly by pinching it a little.

Cut the roll in half, then in 12 even pieces.  Place 1 piece of dough in each cup of the muffin pan.  Bake for 10 - 12 minutes, depending on your oven, or until golden brown and bubbly.  Remove from oven, invert onto a baking sheet, leave the muffin pan over the rolls and let cool for 1 minute.  Serve warm. Makes 12 servings.

NOTE:  You can use any kind of nuts you like.  You can also add raisins or cranberries inside the dough before you roll it up.