Sunday, November 30, 2014

Turkey Talk

Thanksgiving is one of my favorite holidays.  There is nothing better than family sitting all around the table sharing a meal, stories of growing up, and the best part - dessert!  It's kind of a lazy day, you cook, you eat, you watch football, you fall asleep.  It's all about being together and enjoying the big meal of the year.  This year dinner was small for me, but I did switch things up, in the way of flavors just a bit.  I tried a new stuffing recipe that I threw together and it tasted great!  This is how I made it, recipe below.

 I started with a bag of cornbread stuffing mix, celery, onion, herbs, fresh cranberries, an apple and turkey stock.
 Stuff that bird until you can't fit anymore in there!  Season it up and pop it in the oven.
Cornbread Stuffing For Turkey

Ingredients
2 tablespoons of butter
1 tablespoon of olive oil
3 ribs of celery, diced including the leaves
1 medium onion, diced
2 tablespoons parsley
1/2 tsp rubbed sage
1/2 tsp poultry seasoning
1/2 tsp thyme
1/2 tsp garlic powder
1/2 tsp white pepper
1 tsp kosher salt
1 bag of unseasoned cornbread stuffing cubes
2 eggs
1/2 cup of chopped fresh cranberries
1 small apple, cored and chopped
1 32 oz. box of Turkey Stock

Directions
Melt the butter with the olive oil in a medium frying pan over medium high heat.  Add the celery, onion, parsley, sage, poultry seasoning, thyme, garlic powder, pepper and salt. Stir to combine and cook for about 5 minutes, or until celery and onion are tender.  Let the mixture cool.  In a larger bowl, add the cornbread, eggs, celery/onion mixture, cranberries, apple and about 1/2 of the box of stock, reserve the rest of the stock for the turkey.  Mix the stuffing with a spoon until everything is incorporated.

If you are roasting a turkey, stuff  the turkey cavity with enough of the mixture until it is full. Pour the remaining stock in the bottom of the roasting pan for flavor and to baste the turkey.  Roast the turkey according to package directions for the size of the turkey.  Baste the turkey and the stuffing to keep it moist throughout the roasting time. 

Friday, November 28, 2014

Sweet Butternut Squash

OMG!  I am back in the groove again.  I have been decorating for Christmas for the last 6 days and I am still not done!  Why, oh why, do I do this every year!  I wasn't even going to decorate this year, but my youngest decided to come for the holiday, and to my surprise she is coming home to stay.  She has had enough of living in a foreign country and wants to be back at the old homestead.

Yesterday was Thanksgiving, and in between preparing food I was still decorating.  It was hard for me to cook this year, there were only four of us eating. I have never in my life cooked for so few people for this holiday, I always have a houseful for Thanksgiving.  One of the four of us that was eating is a vegan, so no turkey for him!  I had to make something he would eat, he also does not eat anything white, so mashed potatoes were out too!  It is difficult when you are a meat eater, cooking for someone who is not, and you have to come up with a tasty dish that they can eat. So my gears were going and this is what I came up with.

Instead of the traditional sweet potatoes for dinner, I made butternut squash instead.  My mother used to bake sweet potatoes in the oven with butter and brown sugar, so that is how I always made them.  Well, the vegan does not eat butter.  SO, I had this package of cleaned and cut butternut squash in the fridge, I pulled some light brown sugar, honey and cinnamon out of the pantry, tossed it all together in a casserole dish and baked it at 350  degrees for about 40 minutes.  Let me tell you, it was way better than sweet potatoes!

Monday, November 17, 2014

Easy Pom Pom Garland For Any Occasion

I am in the crafting mood since Christmas is staring me right in the face.  I was in the craft store with my sister looking for ideas for things I could make, and buying new things that I needed to decorate.  We walked all the aisles in that store, there were so many good things in there.  I saw these little sparkly pom poms on one of the shelves and knew exactly what I was going to do with them.  I already had the baker's twine at home in various colors.  Now, I do have 2 pom pom makers, one small and one large, but thought why go through the bother of that, when these are already made and were so cute.  These garlands are easy to decorate with, over a chalkboard sign, across a mirror, draped over a kitchen curtain rod, decorate a gift package.  You can make them as long or as short as you want, and you can make them for different holidays.  This is how I made my little garlands.

One package of sparkly pom poms and I used the red and white baker's twine on the card, so it looked like a candy cane.  I separated the colors - 1 white, 1 green, 1 red and so on.   Lay the twine out in a straight line, I left about a 3 inch end on each side of the twine for hanging.   Start tying the pom poms to the twine, wrapping the twine around the pom pom once, then tightly knotting it so you don't see the twine.  Space the pom poms evenly before you knot them to the twine.  Fluff up the pom pom and...........
Done, so cute, shiny and bright.  This is a picture of 3 small garlands using 22 small pom poms.  Adjust the amount of poms poms for how big you are going to make your garland.


Wednesday, November 12, 2014

Cookie Mania!

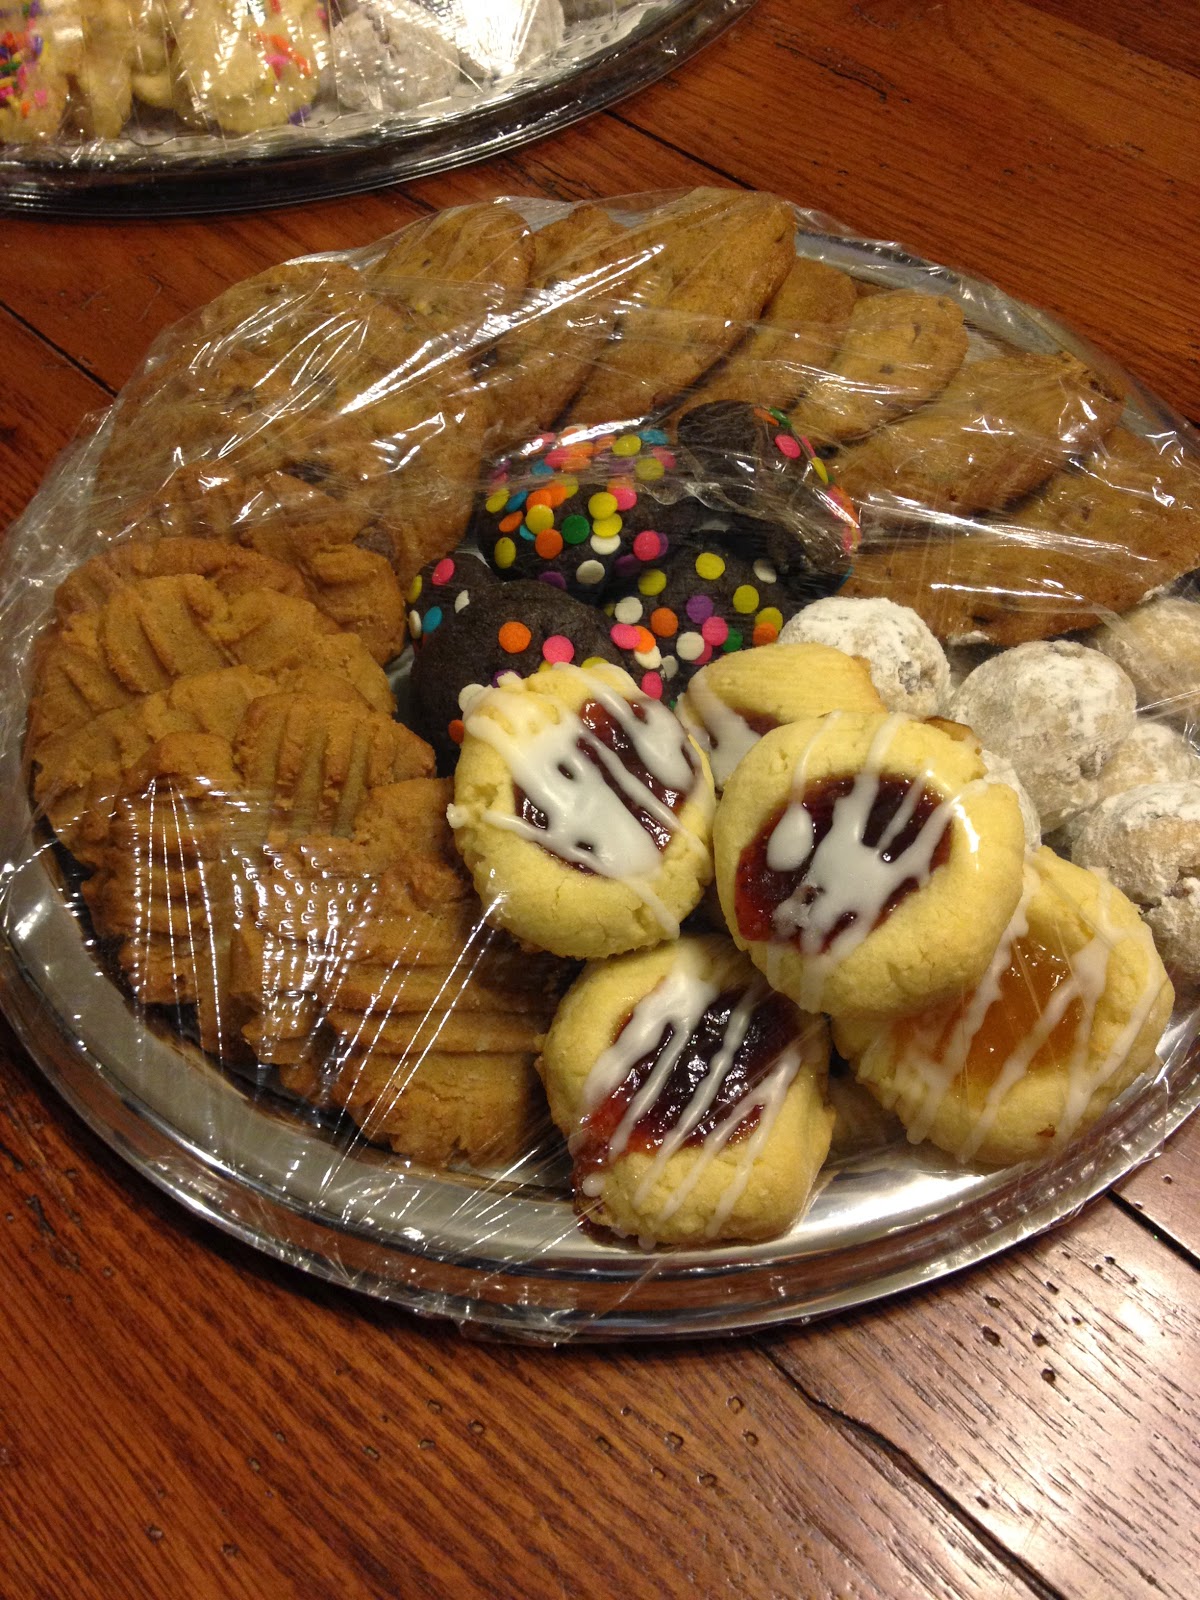
I branched out a little last week, I baked cookies for someone to bring to a baby shower.  I have never done this before, the pressure was on.  I was doing it all myself, no help from anyone, was I up to the task?  I got all the cookie recipes out that were requested, and broke them down as to what days I would bake which cookie. I was a little nervous, would they turn out, would they like them, would they hold up.  It took four solid days of baking from morning to night to get them all done.  I baked 11 different kinds of cookies, decorated them and packed them up to be delivered. They don't look professionally baked or decorated, but they also don't look like they were commercially baked and full of preservatives, and that is what makes them unique and fresh.

Flour, flour everywhere and lots and lots of cookies to make and bake.
Cucidati - Italian Fig Filled Cookies
 Cranberry Orange Almond Biscotti
Lemon Pie Bowties
 Dark Chocolate Cake Cookies
 Lemon Butter Cutouts
 And more Lemon Butter Cutouts
Peanut Butter and Spritz.  Oops! Forgot to take pictures of Chocolate Chip, Butter Balls and Jam Filled Thumbprints, but they are there on the trays too.
 Linzer with Raspberry Filling
 All wrapped up in cellophane and ready to go.
Four trays of cookies, I hope they enjoyed them all!


Tuesday, November 11, 2014

The Most Wonderful Time Of The Year!

Gearing up for the annual Christmas Cookie Baking Party held at my home every year.  It's so much fun getting together with family and friends, baking our holiday cookies all in one day.  Yes it is a lot of work, but so worth it in the end.  We bake from about 8:30 AM to 8:30 PM.  We do take a break for a very nice sit down luncheon that I prepare for everyone, then we get back up and start baking again.  We baked over 1000 cookies for all of us to share last year, everyone went home with a huge bundle of cookies.

This gathering every year started out small 9 years ago when I decided to do this, and has now grown to 12 people this year.  Everyone is asked to bring their own mixer and an assigned ingredient, usually butter, eggs, sugar or flour.  I provide all the sprinkles, flavorings, nuts and other baking ingredients.

We have a great time every year, we laugh sometimes to the point of crying, we share family stories and have girl time.  It's extra special for me this year, my youngest will be home from France and can join in on the fun. I haven't layed eyes on her since August!  I will be so happy when her feet come through the door.  The house will be "over the top" decorated this year in her honor, and her welcome home dinner may be Chinese takeout or Pizza.  Go figure, she is in one of the fanciest food places on earth and wants common food when she comes home, that's my girl!

I am still planning stages of the baking party, I tentatively set the menu, my table scape and party favors.  I did pick out all the cookies we will bake, my niece who is joining us for the first time is a professional baker, and she will decorate them.   Alot of new things going on with this party, I am so excited.

  I made initial tags for each place setting on the table that can also be used as a tree ornament or napkin ring, check them out, as well as some coordinating decorations I picked up along the way.  Stay tuned to this blog for more holiday decorating to come.  This is The Most Wonderful Time Of The Year for me! 
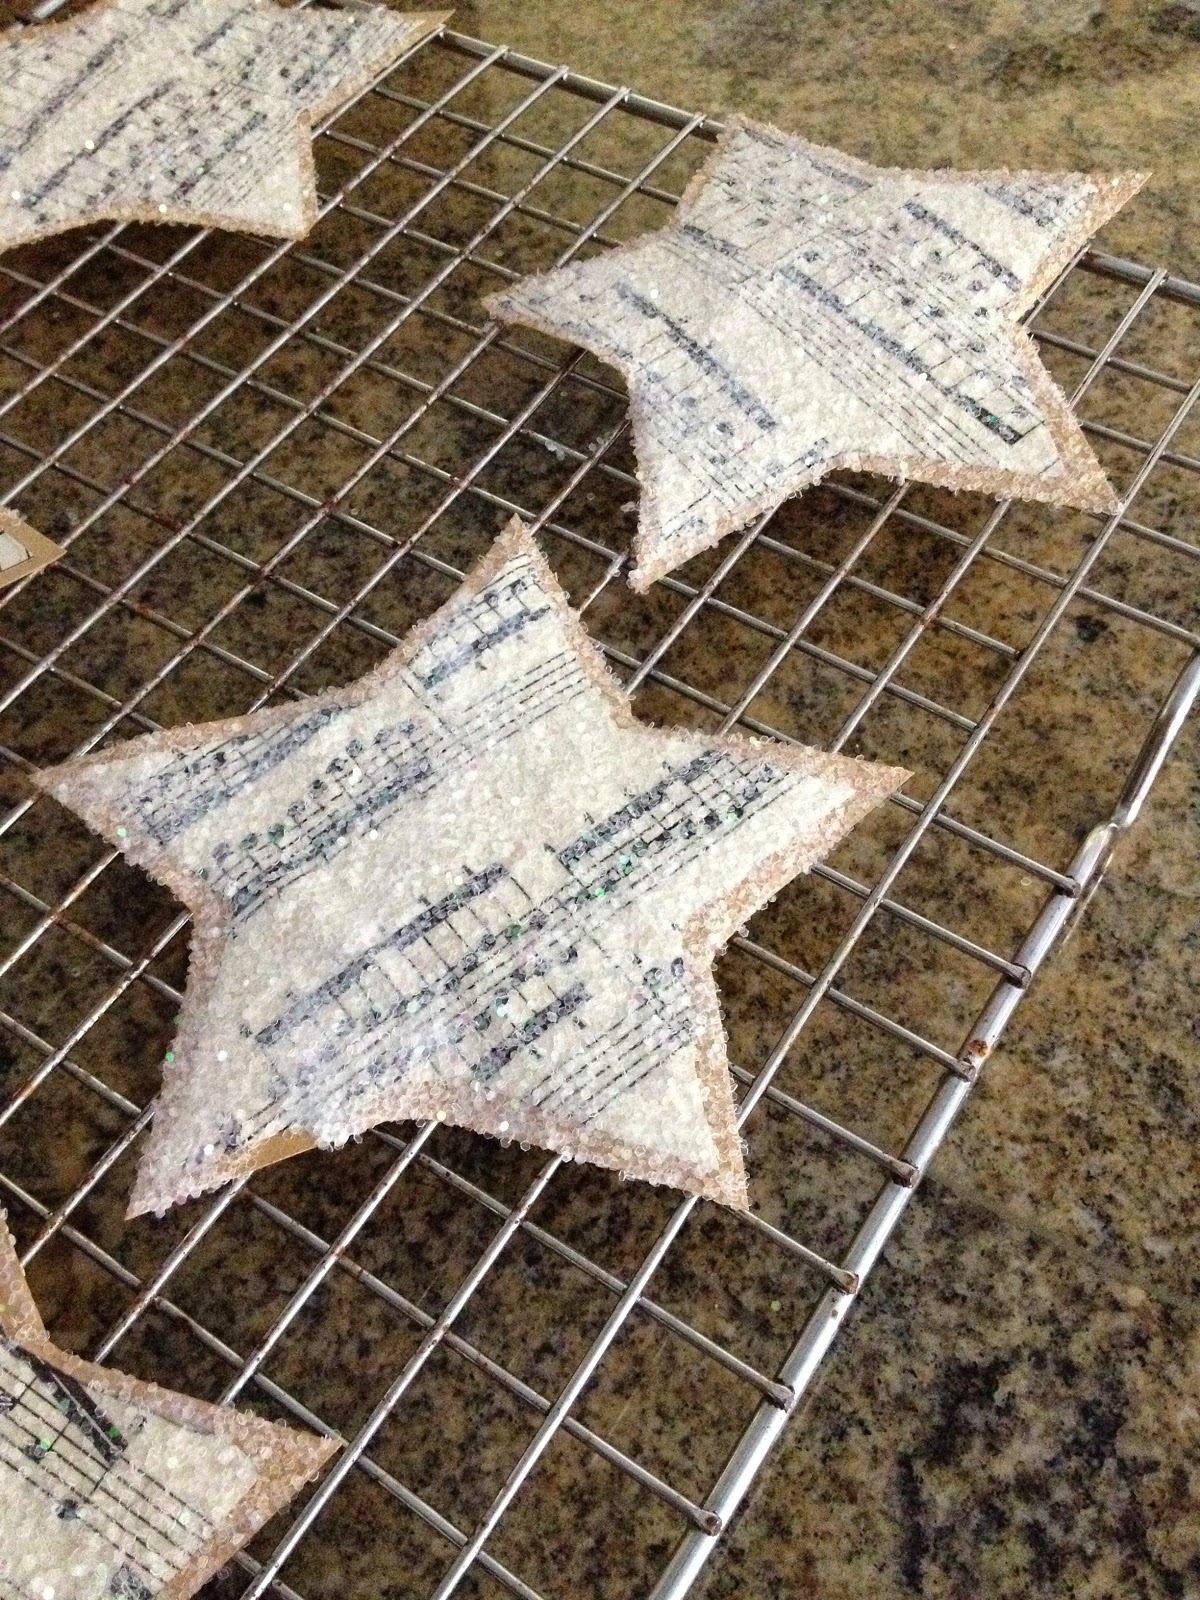
 I used my kids' old music books for the stars, the tags will match all the Christmas decor I will have in my dining room. 
 I traced the stars with a cookie cutter and then cut them out.
 I took a smaller star cutter and cut out the center stars, now I have 12 of each size star.
 For a stiffer backing I used Kraft stock paper.  I glued the paper stars onto the Kraft paper with a glue stick and then cut them out, leaving a small border of Kraft paper around the edges. I brushed a coat of Mod Podge on each star one at a time so it did not dry out, and sprinkled iridescent white glitter over the surface.
 Tap the excess glitter off and dry on a rack, make sure they do not touch each other or they will stick together.  Next I used glitter glue to write everyone's initial on each little star.  Let them dry completely before touching.  You can also use Elmer's glue and fine glitter for the initials as I did here with the green one.
 I found this beautiful, soft velvet ribbon at Marshall's last year, I snagged a bunch of these rolls in different colors, because it was so pretty I could not pass it up .  Each roll was 10 yards, alot of ribbon for $5.99.   I cut each strip of ribbon about 10 inches long for a hanger.
 My initial stars are dried and ready to be glued to the big star.  I snipped some cedar greens from bushes in my front garden, hit them with a dot of glue,  put a few dots of glue on the back of the small star, lay the small star on top of the greens and press so it sticks and dries.
 Fold ribbon over to make a loop and glue to the back of the star.  All done!  Cute little place cards made with things I already had in the house.  
Musical Note Merry Christmas Glittered Banner and Musical Note Burlap Ribbon  - Home Goods
Glittered Snowflakes with Red Satin Ribbons - Christmas Tree Shop


Saturday, November 1, 2014

We Are Always Ready For Some Football Food!

We are a football family and a food loving family, the two go hand in hand in this house.  And what food goes better with watching football than chicken wings in all different flavors.  I grabbed 4 large packs of them at my grocery store last weekend, they were relatively inexpensive, and I made them on Sunday for the game.  They were enjoyed by all with no leftovers, I love when that happens!  This is how I made them.

After taking the wings out of the package, I rinsed them off, patted them dry with paper towels, and lined them up on a baking sheet with a cooling rack on top of it.  I brushed them with canola oil, it helps to crisp up the skin, then I seasoned with salt and pepper.
I used a little more seasoning in the form of this little jar of Grill Mates Chicken Rub.  Just sprinkle it over all the wings.  Bake the wings at 400 degrees for 30 minutes.
Now here comes the best part, the finger licking good stuff!  I took the sheets out of the oven and slathered Baby Rays Honey BBQ sauce on 1/3 of the wings, Teriyaki Sauce on 1/3 of the wings and Franks Hot Sauce on last 1/3 of the wings.  Pop them back in the oven for 10-15 minutes, then switch to the broiler for 5 minutes.  Delicious wings for the football game and so easy to make.
So good!