Showing posts with label music. Show all posts

Tuesday, November 11, 2014

The Most Wonderful Time Of The Year!

Gearing up for the annual Christmas Cookie Baking Party held at my home every year.  It's so much fun getting together with family and friends, baking our holiday cookies all in one day.  Yes it is a lot of work, but so worth it in the end.  We bake from about 8:30 AM to 8:30 PM.  We do take a break for a very nice sit down luncheon that I prepare for everyone, then we get back up and start baking again.  We baked over 1000 cookies for all of us to share last year, everyone went home with a huge bundle of cookies.

This gathering every year started out small 9 years ago when I decided to do this, and has now grown to 12 people this year.  Everyone is asked to bring their own mixer and an assigned ingredient, usually butter, eggs, sugar or flour.  I provide all the sprinkles, flavorings, nuts and other baking ingredients.

We have a great time every year, we laugh sometimes to the point of crying, we share family stories and have girl time.  It's extra special for me this year, my youngest will be home from France and can join in on the fun. I haven't layed eyes on her since August!  I will be so happy when her feet come through the door.  The house will be "over the top" decorated this year in her honor, and her welcome home dinner may be Chinese takeout or Pizza.  Go figure, she is in one of the fanciest food places on earth and wants common food when she comes home, that's my girl!

I am still planning stages of the baking party, I tentatively set the menu, my table scape and party favors.  I did pick out all the cookies we will bake, my niece who is joining us for the first time is a professional baker, and she will decorate them.   Alot of new things going on with this party, I am so excited.

  I made initial tags for each place setting on the table that can also be used as a tree ornament or napkin ring, check them out, as well as some coordinating decorations I picked up along the way.  Stay tuned to this blog for more holiday decorating to come.  This is The Most Wonderful Time Of The Year for me! 

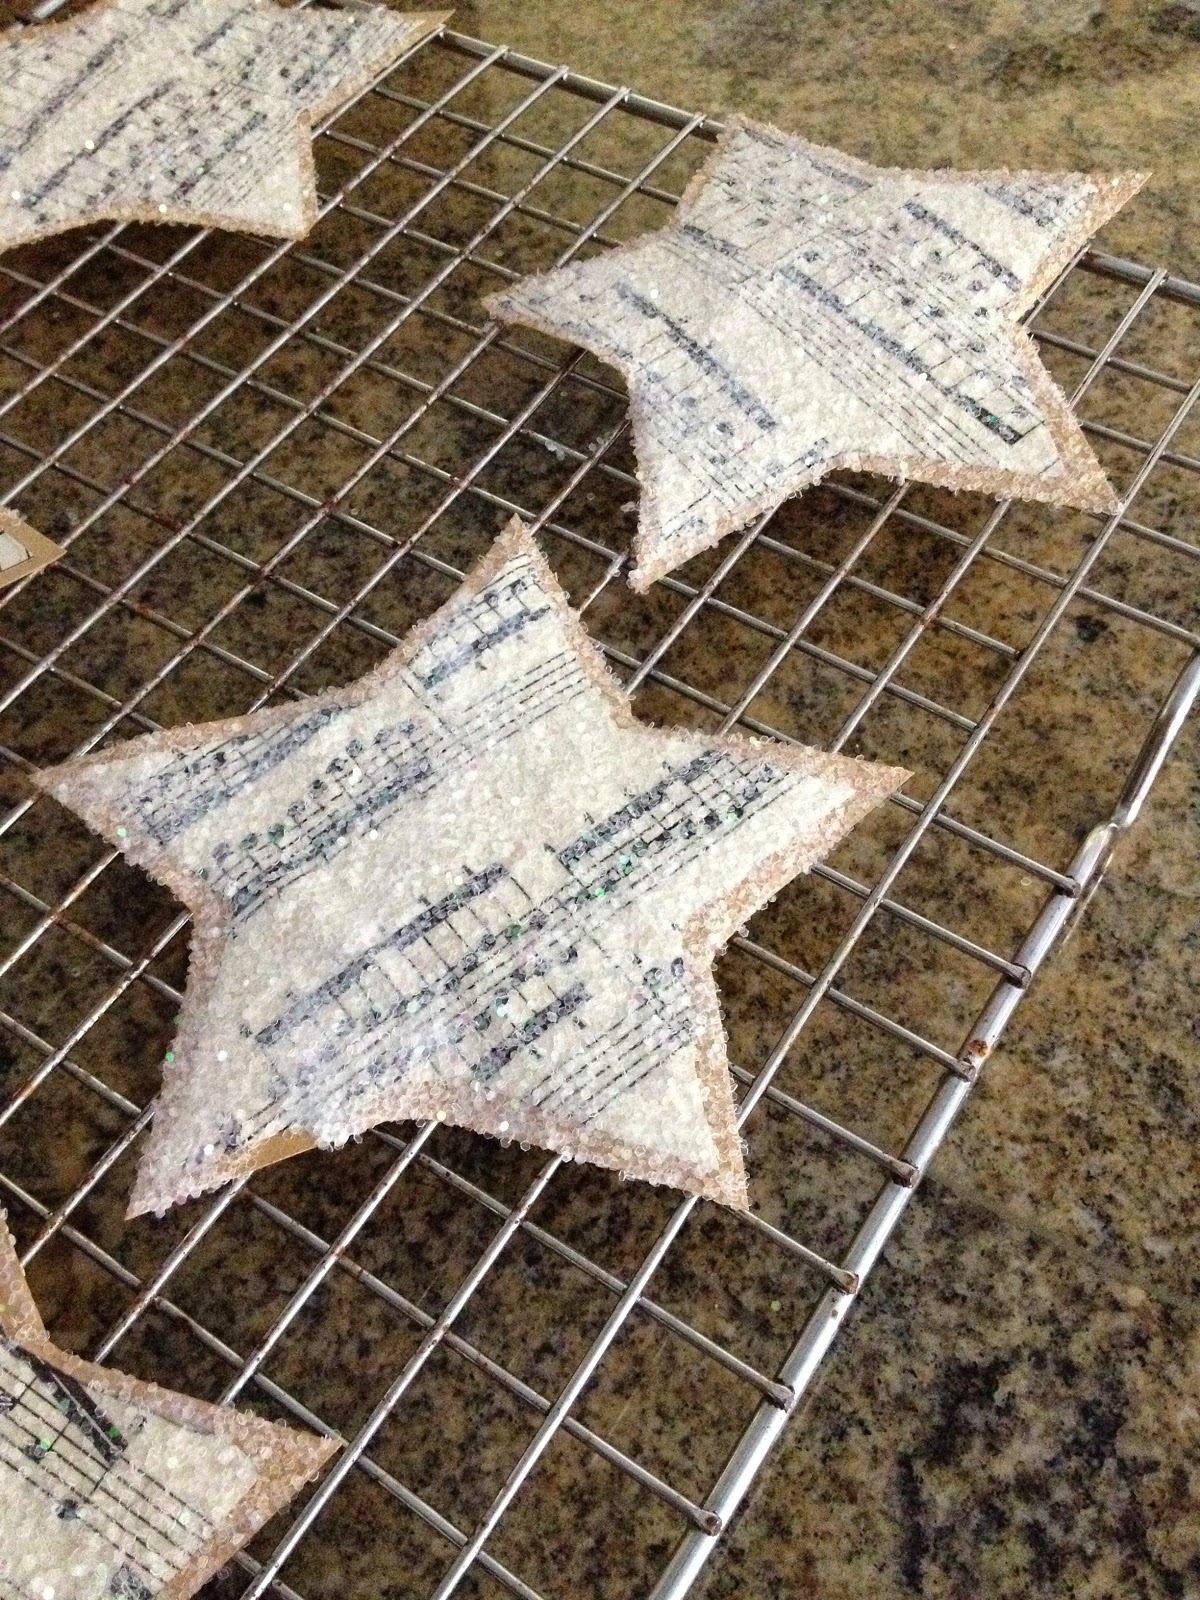
 I used my kids' old music books for the stars, the tags will match all the Christmas decor I will have in my dining room. 
 I traced the stars with a cookie cutter and then cut them out.
 I took a smaller star cutter and cut out the center stars, now I have 12 of each size star.
 For a stiffer backing I used Kraft stock paper.  I glued the paper stars onto the Kraft paper with a glue stick and then cut them out, leaving a small border of Kraft paper around the edges. I brushed a coat of Mod Podge on each star one at a time so it did not dry out, and sprinkled iridescent white glitter over the surface.
 Tap the excess glitter off and dry on a rack, make sure they do not touch each other or they will stick together.  Next I used glitter glue to write everyone's initial on each little star.  Let them dry completely before touching.  You can also use Elmer's glue and fine glitter for the initials as I did here with the green one.
 I found this beautiful, soft velvet ribbon at Marshall's last year, I snagged a bunch of these rolls in different colors, because it was so pretty I could not pass it up .  Each roll was 10 yards, alot of ribbon for $5.99.   I cut each strip of ribbon about 10 inches long for a hanger.
 My initial stars are dried and ready to be glued to the big star.  I snipped some cedar greens from bushes in my front garden, hit them with a dot of glue,  put a few dots of glue on the back of the small star, lay the small star on top of the greens and press so it sticks and dries.
 Fold ribbon over to make a loop and glue to the back of the star.  All done!  Cute little place cards made with things I already had in the house.  
Musical Note Merry Christmas Glittered Banner and Musical Note Burlap Ribbon  - Home Goods
Glittered Snowflakes with Red Satin Ribbons - Christmas Tree Shop


Friday, January 24, 2014

Recycle and Reuse - Make A Pretty Wreath

I have a lot of these old piano music books that my husband held on to, he took piano lessons when he was a kid.  They are a little worn and yellowed and perfect for arts and crafts.  Since Christmas is over and now there is no wreath on the door, I decided to make one.  While cleaning out the basement with my nephew the other day (a huge task), I found an old ratty grapevine wreath tucked away on a shelf.  Instead of throwing it away, I dusted it off and recycled it.  I tore all the old stuff off of it and brought it back to life.  I used a roll of burlap for a simple bow, and folded the music sheets to make a rosette. I then placed a metal flower with a rhinestone center in the middle of the rosette, and rolled some music sheets up as accents.  I sprayed the paper with polyurethane, to help it withstand the snow we are getting, as it hangs on the outside of the front door.

Cleaned up grapevine wreath, roll of burlap (Michael's), floral wire, scissors and wire cutters. Don't use your scissors to cut wire it will ruin them!
 Simple burlap bow.  You will also need tape, and a glue gun.  To make the rolls - Rip the music sheets into quarters and roll on an angle from the corner, hot glue or tape it to hold it.  I made four but make as many as you like, let the inner creativness come out!
Rolled up sheet music.  Forming the rosette -Fold the paper (2 quarters) accordion style to form two sides and tape or hot glue them together.
 Two sides folded and then taped together.
 Wire on the bow.  Hot glue the metal flower in the center of the rosette, and glue onto the bow, place the rolled music behind the bow and glue.  It's a simple style wreath with a rustic flair and can be hung anywhere in your home.


Saturday, June 15, 2013

Little Touches Go a Long Way


I found that painting the front door for every season really changes the way the front of the house looks.  I only buy a quart of paint, in the color I want, and I can paint the door for 2 seasons.  I painted the door a deep orange - rust color called Falling Leaves from Glidden and had Home Depot color match it.  I did this in the Fall. 

For Summer I painted it this color called Loyal Blue from Sherwin Williams.  What a difference a little paint and time make!

I bought 2 of these Boston Ferns for either side of the door. I only paid $8.98 each for them at Lowe's.  Look how huge and gorgeous they are.  Then I found 2 of these containers at BJ's Wholesale for $19.99 each, and they are weather resistant.  Spending a little time looking around will save you money ladies!  Everywhere else I looked for the ferns was charging $24.99 and up.  Lowe's was the cheapest. 

Then I made a new wreath for the door.  I found all the flowers at Dollar Tree ($1.00) and Michael's for 65% off so the whole wreath cost about $10.00! I re-purposed an old grapevine wreath that I had hanging in the garage.  Pull out old stuff and you never know what beauty you can create from it.

This is the completed entryway.  Sorry my picture is a little crooked I have a problem with taking pictures! I am working on it.

 Redecorated the mantle - AGAIN!  I told you I get tired of the way things look.

Also did the book shelf.

I made my husband this little music nook in the bedroom, when I painted and re-decorated,  for his organ/piano.  He took piano lessons when he was a kid and later as an adult.  He loves playing piano when he has time (that means when I am not bugging him to do stuff for me).  We have this nook right next to the fireplace.  It fits perfectly and is not out in the middle of the floor like before.  I painted the frames, that I got at the thrift store (.25 - .50), and found some old sheet music and piano books that make up the artwork.  Now he has his own little place to "tickle the ivorys".