Friday, January 22, 2016

Big On Pizza!

Super Bowl 50 is right around the corner football fans!  It's time to think of party food.  Always on the menu at my house is pizza, it's a favorite, easy to eat, and virtually no mess for crazy fans.  Finger food is what people like, a lot of hand motions going on that day and pizza is a one handed kind of food.  Instead of making the usual round pizza this time, I am making a slab pizza out of my fresh dough.  Eating a square slice is much better to hold, while screaming at a referee for a bad call, than a  pie slice!

My homemade dough, recipe below.
You can use homemade sauce (recipe on this blog 6/12/13)  A good friend recommended this sauce, now my favorite.
Roll the dough out to fit your baking sheet, add sauce, cheese and toppings.  I used a little olive oil on my baking sheet so my pizza doesn't stick.  If you want an extra crispy crust, when the pizza is almost done I slide it off the pan and onto the rack in the oven for a few extra minutes, to make the crust extra crispy.
 Everything is better homemade!  Nice, crispy brown crust, melted cheese and pepperoni, equals great pizza.
PIZZA DOUGH

INGREDIENTS
2 packages of active dry yeast
1 Tbsp sugar
3 Tbsp canola oil (I use olive oil because I like the fruity taste of it)
1 1/4 cups of very warm water
3 1/2 cups of unbleached flour (plus additional flour for kneading)
2 tsp salt (I like the flavor of  kosher salt that's why I use it but you can use regular table salt)

DIRECTIONS
Attach dough hook to mixer. Combine the yeast, sugar, oil  and water in the bowl of the mixer.  Stir it up until the yeast and sugar are dissolved. Add 3 cups of the flour and the salt and turn the mixer on medium speed.  As the ingredients combine, the dough should start pulling from the sides of the bowl.  As this happens add up to the 1/2 cup of flour that is left.  Let the mixer knead the dough for about 5 minutes.  Turn mixer off.  The dough will be a tiny bit sticky. Turn the dough out onto a floured surface and knead it by hand about 10 - 12 times. It should be very smooth.  Roll it into a ball, seam side down.  Oil a large bowl with about 1 Tbsp of oil.  Put the dough in the bowl seam side up and roll the top in the bottom of the bowl.  Turn the dough right side up.  Cover the bowl with a linen towel and set in a cool dry place.  Let it rise for 1/2 hour.

When the dough has risen, dump it out of the bowl onto a floured surface.  Roll dough to fit your greased baking sheet, stretch to the corners of the pan and press lightly so it stays. Let dough rest for about 5 minutes.  Add sauce and toppings and bake at 375 degrees for about 25 - 30 minutes (depending on your oven). When pizza is baked, remove from oven and cool on a cooling rack to keep the crust crispy. If you are not using the dough right away cover with a damp linen towel and put in the refrigerator for up to 3 hours. Take out of the refrigerator and let the dough come to room temperature before adding topping and then bake.


Sunday, January 10, 2016

Simple Savory Rolls

Yea, I got sucked in.  I go to both of those big box stores, which I love, and saw crescent roll sheets.  Of course they were in a mega box, 4 to a box, so I couldn't help myself and bought them.  They were sitting in the fridge over the holidays, I thought I would certainly use them for something, I didn't.  They were staring me down, so I used them to make Italian Cheese and Basil rolls for dinner with my Chicken Marsala.
Recipe below.
To print recipe, click on it, highlight and print.
To view photos in a larger format, click on them.

I started with a sheet of the crescent dough, melted butter, basil and Pecorino Romano cheese.  Brush the melted butter over the dough.
 Sprinkle on the grated cheese and sliced basil.  Start rolling up at the long end of the dough.
 Slice the roll and place on a parchment lined baking sheet.
 Bake until golden brown. They come out soft on the inside and crispy on the outside, with a savory and salty taste, so good I couldn't stop eating them!
And, they look pretty!  I think these are good enough to use even as an appetizer for a party.  Mix 'em up by stuffing with other ingredients, use your imagination.  Sweet, or savory and salty, you choose.
Italian Cheese and Basil Rolls

Ingredients
1 tube of sheet crescent roll dough
4 tablespoons butter, melted
6 fresh basil leaves, sliced
1/2 cup grated Italian cheese, I used Pecorino - Romano

Directions
Preheat oven to 350 degrees.  Line a baking sheet with parchment paper, set aside.  Unroll the sheet of crescent dough.  Brush the dough with melted butter, sprinkle with cheese and sliced basil.  Roll the dough up from the long end, seal the edge by pinching it.  Cut the roll into 2 inch slices and place on the baking sheet. Bake for 12-14 minutes or until golden brown.  Serve hot.  Makes 12 rolls.


Saturday, January 9, 2016

Sweet Marsala

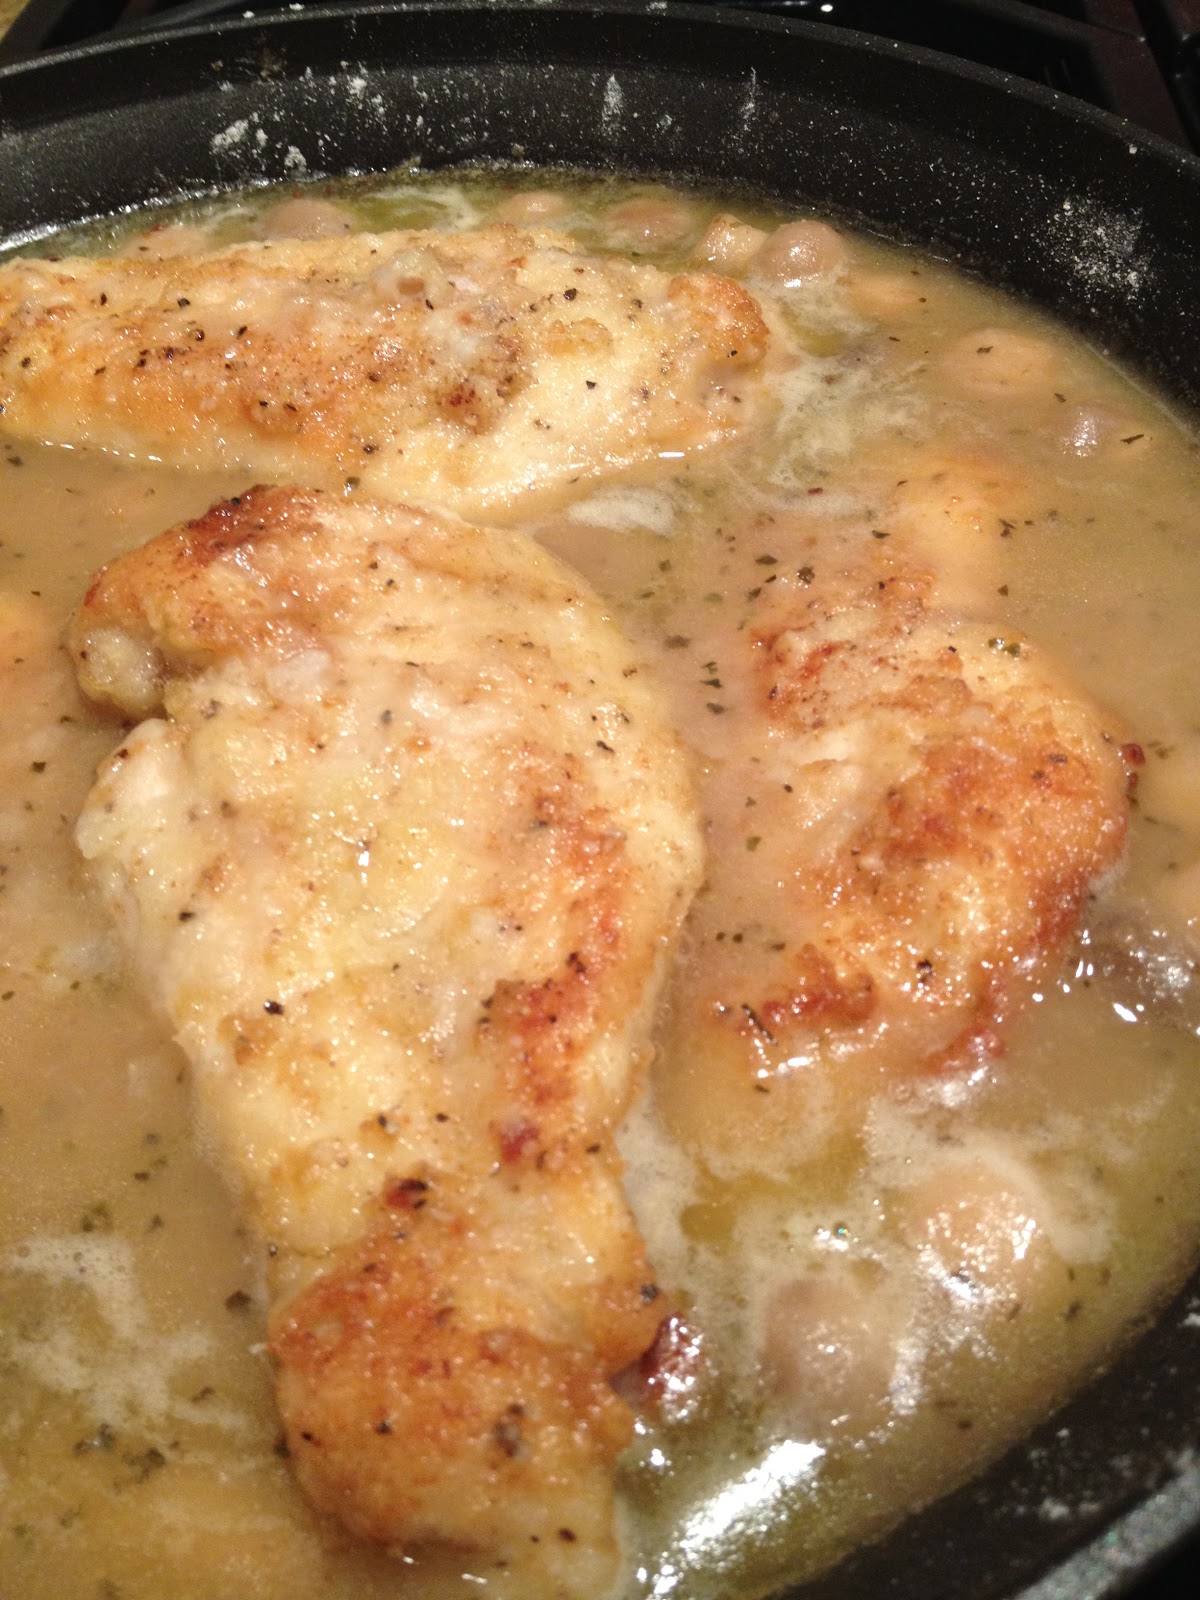
Chicken cutlets are one of my favorite cuts of chicken.  Boneless, thin and tender, means you can make many fast and delicious dishes from them.  I made Chicken Marsala from my cutlets, it's easy to make, looks like you spent the whole day in the kitchen (oh no I didn't!) when served up on a platter.  This recipe is restaurant quality and it didn't take that long to make it, that's the best part.  The hubby was happy when he walked through the door, the aroma in the house, well it was heavenly!
Recipe Below.
To print recipe, click, highlight and print.
To view photos in a larger format click on them.

I started with these few ingredients and added other things from the pantry.  I always have marsala wine in the house for this dish, as well as, if I get the urge to make cannolis, it's in the shell recipe that I have.
 Dredge the chicken in the flour mixture and cook in butter and olive oil, two great flavors together!
 Nicely coated and browned, now on to the mushrooms.  I didn't have fresh mushrooms, my son ate them all, so I relied on my pantry for canned mushrooms, no worries, they worked just as well.
 After the mushrooms are done, get the sauce going, then add the chicken back into the pan to simmer everything together.  Looks awesome!
 Serve it up, chicken on the plate first, then top with the rich and savory Marsala sauce.
 And dinner is served. Dig into this tender, juicy, full of flavor chicken dish. You won't be sorry, and it's quick to make.  I served mine with basil mashed potatoes, a salad, and Italian cheese and basil rolls.  More on those later.  ENJOY!
Chicken Marsala

Ingredients
1/3 cup flour
2 teaspoons garlic powder
1 teaspoon salt
1/2 teaspoon black pepper
4 chicken cutlets
4 tablespoons Extra Virgin Olive Oil
4 tablespoons butter
2 cups sliced baby portabella mushrooms
1 1/2 cups chicken stock
3/4 cup of Marsala wine
1 1/2 teaspoons dried basil
1 1/2 teaspoons onion powder

Directions
In a resealable plastic bag, add the flour, garlic powder, salt and pepper.  Shake to combine.  Add the chicken cutlets and shake to coat them completely.  Reserve the remainder of the flour mixture you may need it to thicken the sauce.

Heat 2 tablespoons of the oil and 2 tablespoons of the butter, in a large frying pan over medium heat. Add the chicken, cook for 6 minutes on each side, until nicely browned.  Transfer to a dish.

Do not clean the pan.  Heat remaining 2 tablespoons of oil and butter in the same pan, add the mushrooms and cook for 2-3 minutes. Add the chicken stock, and loosen any of the brown bits on the bottom of the pan.  Stir in the wine, basil and onion powder.  Bring to a boil, reduce heat to low and simmer for 8 minutes.  If the sauce needs to be thickened, whisk in some of the reserved flour. Return the chicken to the pan, simmer for 8 minutes until heated through. Makes 4 servings.

Wednesday, January 6, 2016

New Year, New Food

To kick off my New Year, I am leaning towards making some meals a little healthier.  I looooove food, so you know I can't give up all the good stuff.  But, I am going to try and make things lighter, better for all of us in this house.  Cooking this way is not hard, it's just that you have to be creative and willing to substitute ingredients in and out of a recipe.  That's not too hard, right?  The good thing about this dish I am getting ready to share with all of you, is that it's a pasta dish and who doesn't like pasta?  I switched out the meat and just used vegetables, a little wine and crushed red pepper to give it a little kick.  The family loved it, especially the hubby, he told me five times what a great meal it was!

Here is my take on a vegan/vegetarian Bolognese Sauce that I put together for dinner last night.   It's easy, and all in one pan.  The sauce is thick, rich, hearty and flavorful, and you will want to make it again and again.  Add whatever kind of pasta you like, I like linguine it's my favorite,  add some grated cheese (haha, who am I kidding, add ALOT of grated cheese!) before serving and um, um good!
Recipe below.
To print recipe, click, highlight and print.
To view photos in a larger format, click on them.

A few main ingredients to start the sauce.
 Dice the carrots.....
 an Italian sauce is not complete without garlic....
 diced sweet onion....
 diced green and yellow zucchini for added taste and color....
 I used canned tomatoes, fresh basil, red wine and THE HEAT, crushed red pepper.
 All in one pan, doesn't get any easier than that!  Don't forget the fresh basil, there is nothing like the scent of fresh basil, it mesmerizes me.  Stir it all together....
 Drum roll please and here it is, cooking slowly (Rome wasn't built in a day), good flavor takes time to cook.
 About 1/2 hour before serving, get your pasta water going, cook the pasta and drain.
 Top that pasta with some Bolognese sauce and.......
 don't forget the cheese!  How awesome does that look?  Well, it tastes even better.
Vegan/Vegetarian Bolognese Sauce
Ingredients
3 tablespoons Extra Virgin Olive Oil
4 large cloves garlic, minced
2 large carrots, small dice
1/2 large sweet onion, small dice
1/2 green zucchini, medium dice
1/2 yellow zucchini, medium dice
1 - 28 oz. can crushed tomatoes
1 - 15 oz can diced tomatoes
1/2 teaspoon crushed red pepper, more if you like heat
2 bay leaves
2 teaspoons Italian seasoning
2 tablespoons fresh chopped parsley, or use 1 tablespoon dried
10 fresh basil leaves, sliced (chiffonade)
1 tablespoon sugar, more if you like a sweeter sauce, cuts the acid
1/4 cup red wine, not cooking wine
salt and pepper to taste
1 pound cooked pasta
Grated Parmesan cheese (or use vegan cheese)

Directions
Heat the olive oil in a large skillet over medium high heat.  Add the garlic and cook until fragrant, but do not brown it.  Add the carrots and onion and sweat them until tender.  Add the zucchini and cook for two minutes. Add crushed tomatoes, diced tomatoes, crushed red pepper, bay leaves, Italian seasoning, parsley, basil, sugar, red wine, salt and pepper, stir to combine.  Reduce heat to medium, cover and cook for 2 1/2 hours, stirring occasionally. Reduce heat to low and let simmer for 1 hour. Toss with your favorite cooked pasta and top with grated cheese.  

Friday, January 1, 2016


A peaceful, healthy, prosperous Happy New Year 2016 to all!  Tomorrow is the first blank page of a new book, write yourself a good one.

  I have been taking a much needed break over the holidays.  I will be changing the format of this blog during that time.  Keep following!


Posted on by The Bee Skep | No comments

Thursday, December 24, 2015

Christmas Party Table Scape

I love Christmas and as always, the whole house is trimmed from top to bottom.  Every year, for my annual Christmas Cookie Baking Party, I try to come up with a new setting for the the dining room table for our luncheon. This year it was set beautifully for all to enjoy, gift bags for everyone (see below) included a CD of Christmas music, a pashmina, random Christmas themed gifts for all, a dated baking party coffee mug, as well as a candy bar.  Christmas presents to take home and enjoy, and to remember what a great day we had.

 In the box covered in plaid wrapping paper and a handmade bow was the coffee mug.  On the table I used an off white silver and gold plaid tablecloth, ran red plaid and buffalo checked wool scarves across the the table, red chargers, off white plates, a holly rimmed salad plate, silver flatware, shiny linen napkin tied with baker's twine, silver jingle bell, a homemade place card with everyone's name and a sprig of cedar. 

Down the center of the table I used more fresh cedar, as well as, artificial flocked scotch pine greens with red berries and pine cones tucked into the fresh greens.  Also tucked into the greens, champagne and red glittered pine cones, and large gold, silver/champagne colored Christmas balls that matched the same balls in the chandelier.  The champagne sled and glittered reindeer and the champagne bottle brush and red berry trees, were down the center of the table.

All the girls sat down to a lunch of  Creamy Brie with Grapes and Fresh Pears, Chicken Salad with Cranberries and Almonds with a Mayonnaise Dill dressing or Chicken Salad with Cranberries and Almonds with a Dijon Mustard and Dill dressing, A Layered Vegetable Salad and A Greek Pasta Salad with Feta Cheese.

Then it was on to dessert, Sugar Cookie Fruit Pizza or Peanut Butter Bars.
Party Gifts - Everyone had a pashmina tied in a bow to the backs of their chairs to take home with them.
 And my creative sister had these mugs made for everyone as a remembrance for a hard days work.  

The CD was also made by my sister, she put a lot of hard work into that too. Thanks sis for all your help!
Another gift, the candy bar I put together. I bought Christmas themed food containers to stuff with chocolate for everyone to take home as well.

This is how I made the candy bar jars.
I re-used these crock jars that I had, and started with a roll of burlap and lace ribbon.
Cut it to go just halfway around the jars, then used a smaller Christmas ribbon to run down the center of the lace.
 
I ran a line of hot glue down the center of the lace and carefully pressed the Christmas ribbon on the glue.
That was easy, look how cute that is!
All three are done, I actually made more, the candy bar kept expanding.
I wrapped the jar with the ribbon and used hot glue to attach it to the jar.  The glue will peel right off when all the candy is gone and the jar is used for something else.  I tucked the chalkboard signs with twine down inside the ribbon to hold it, added a clothes pin clip, but thought it needed something else so I added the cedar sprig.  CUTE!
When all the jars were done, I filled them with chocolate and peppermint candy, what woman doesn't like chocolate or candy?!
Merry Christmas, Happy Holidays, Happy New Year, Peace and Love to everyone who follows this blog!