Tuesday, October 20, 2015

Vegan Banana Bread

Yes!  You can make banana bread without eggs, who knew.  Until I started researching these things, I thought it was impossible to bake anything without eggs.  I read labels all the time now, since my middle son started eating a plant based, vegan style diet almost two years ago.  He doesn't eat eggs or cheese either, the only thing he eats from the dairy section is almond milk.  Food items at the market will say vegan or non-dairy on the packaging, but read the ingredients and low and behold it will have eggs in it.  EGGS are not dairy, but are sold in the dairy section of the market.  What they are, is a by-product of an animal - the chicken or poultry if you will, and poultry = not vegan! Well, Well, Well, what a secret if you are new to this whole vegan thing.

Although this recipe did not use eggs at all, I am sharing two tips with you today.  This first tip, is a substitute for eggs that I found using ground flax/flax meal.  I always have a bag of flax in the pantry for vegan cooking. So here goes the mix:
1 tablespoon of ground flax + 3 tablespoons of water = 1 egg.  Whisk until the mixture becomes thick, creamy and has an egg like consistency.  Use in place of eggs in baking.

The second tip, is using bananas that have over ripened.  I peel them, put into a resealable bag, squeeze all the air out as I am sealing the bag, and put them in the freezer so I always have bananas if I need them for baking.  The bananas that I put in the freezer didn't turn brown, so the color was consistent with the other bananas that I used for my banana bread.  Egg replacement using bananas: 1/2 mashed banana = 1 egg.  If you don't want the flavor of banana use another replacement.
Recipe below.
To print recipe, click, highlight and print.
To view photos in a larger format, click on them.

Some of the ingredients for my bread. I always get everything out before I start baking, it's easier that way.
 Sift the dry ingredients together, gets rid of lumps in anything.
 Almond milk and cider vinegar.
 No mixer required, stirring in the dry ingredients.
 Chop walnuts up and fold them in.
All done and ready to jump into the pan!
 I used canola oil to grease two 9 x 5 loaf pans and dusted them with flour. One for now and store one in the freezer for later.
 Ready for the oven, bake at 350 degrees for 1 hour.
 And you have yourself  two beautiful, golden brown, banana breads that are actually good for you!
Chunky pieces of banana make it really moist, and the walnuts give it a little crunch!
MOIST VEGAN BANANA BREAD

Ingredients
2 cups unbleached flour
3/4 cups cane sugar
1/2 cup dark brown sugar
3/4 teaspoon baking soda
3/4 teaspoon salt
1 teaspoon cinnamon
1/2 cup unsweetened almond milk
1 teaspoon apple cider vinegar
4 large ripened bananas, mashed
1/4 cup canola oil
2 tablespoons pure maple syrup
1 teaspoon vanilla
3/4 cup chopped walnuts, optional

Directions
Preheat oven to 350 degrees.  Grease 2 - 9 x 5 loaf pans with a little canola oil and dust them both with flour, set them aside.

In a medium bowl, sift the flour, sugars, baking soda, salt and cinnamon together, set aside.  In a large mixing bowl, whisk the almond milk and the cider vinegar and let it sit for about 1 minute. Add the mashed banana, canola oil, maple syrup and vanilla, whisk until combined.  Add the dry ingredients to the wet ingredients, about a cup at a time, and fold in with a spatula. DO NOT OVER MIX, or the batter will be tough.  Fold in the walnuts with a spatula.

Divide the batter between the two loaf pans.  Bake for 1 hour, or until a cake tester inserted comes out clean (see note).  Remove from the oven and place on a cooling rack for 5 minutes. Loosen the bread around the edges of the pans with a knife or spatula.  Flip the pans over until the breads drop out of the pans.  Remove pans and let them cool on the rack. Serve warm or cold.

NOTE:  Remember, all ovens vary so baking time will differ. Be sure to use a cake tester or a toothpick inserted into the bread to check to see if it's done.  When the tester comes out clean, the bread should be done.


Monday, October 19, 2015

Not So Shrimpy Shrimp

My hubby wanted some kind of fish for dinner on Sunday night, so I took out jumbo shrimp.  There are alot of different ways to make shrimp, so it was something easy.  Shrimp is not the cheapest fish to buy, the price is always up.  But if I happen upon a sale, I buy it and store it in the freezer.  I usually buy cooked, shelled, deveined shrimp unless I am putting it on the grill, then I buy raw shrimp.

It was chilly outside on Sunday so I used cooked shrimp for this dish, because I was going to have to cook it inside.  I rummaged through the fridge, found a container full of fresh crab meat that I had to use and started pulling other ingredients out of the pantry.  I lined my ingredients up, and decided it would be crab stuffed butterflied shrimp with white wine butter sauce for dinner.  Amazing things happen in the kitchen when I let my creative juices flow. This shrimp was easy and didn't take a lot of time to prepare.  The hubby was oohing and ahhing all over the place when dinner was served, he was definitely a happy guy!

Just a few of my ingredients to make this awesome shrimp.
 Break the crab up with a fork, pick through it for any shells, and rinse the shrimp.
 Mix together mayo, breadcrumbs and old bay.
 Butterfly the shrimp, stand up on a baking sheet.
 Drop a teaspoon of the crab mixture on to each shrimp and bake.  I told you it was easy!
 The wine butter sauce for dipping, delicious!
 It was gone as soon as it hit the plate, yeah he devoured it, and repeatedly kept saying I love you, I love you, I love you......
Crab Stuffed Butterflied Shrimp with White Wine Butter Sauce

Ingredients
Olive Oil 
16-20 cooked jumbo shrimp, peeled and deveined
1/2  lb of fresh crab meat, picked through for any shells
1/2 cup of mayonnaise
2 tablespoons seasoned breadcrumbs
1 tablespoon Old Bay Seafood Seasoning

For the Sauce
2 tablespoons butter
2 cloves of minced garlic
2 teaspoons chopped fresh parsley
Juice of a whole lemon
1/2 cup dry white wine or cooking wine

Directions
Preheat oven to 350 degrees.  Use about 1 tablespoon of olive oil to coat a baking sheet so the shrimp do not stick to the pan.  Rinse the shrimp in a colander and make sure they are clean, no veins.  Taking a sharp knife go down the back of the shrimp, cutting it so you can open it, but do not cut all the way through.  Pull the shrimp open a little bit, and place them on the baking sheet cut side down with the tails up.

Add crab meat to a medium size bowl.  Add the mayo, breadcrumbs and Old Bay seasoning.  Mix until all is combined.  Drop 1 teaspoon of crab meat mixture to each flattened shrimp.  Bake in the oven for 20-25 minutes, until crab meat is lightly browned.  You can also place under the broiler for a few minutes if you want it a little crispy, watch so they don't burn.

White Wine Butter Sauce: Melt butter in a small pan over medium high heat.  Add garlic and saute until fragrant.  Add the parsley and lemon juice.  Cook for 2 minutes, add the white wine.  Reduce heat to medium and cook for another 3 minutes.  Pour the sauce over the shrimp or serve on the side for dipping.


Thursday, October 15, 2015

Couscous, It's A Funny Word

I started making couscous for the vegan in the house, he likes it, so I thought I would give it a try too.  Couscous is made from semolina wheat, and is cooked by steaming it, which makes it a fast and easy dish to prepare.  I roasted fresh mixed vegetables in the oven and tossed them with the couscous for his meal the other night.  And well to my surprise, couscous is going to be a favorite of mine too!  It's light, and mixed with the vegetables it's a meal all in itself. 

I started looking into what else I could do with these teeny tiny little grains of pasta, basically that's what it is.  While searching around, I found that you can eat it hot or cold, mix it with fruits and nuts, make a salad with it or toast it for a more crunchy texture.  These are just a few ideas, be creative with it, it's versitile.

There are some different kinds of couscous out on the market.  Moroccan, the tiny grained couscous, Iraeli couscous is a small peppercorn size couscous and Lebanese couscous is a larger pea sized couscous, these three are just a few.

You can steam couscous in water or chicken, beef or vegetable stock.  I used vegetable stock for this version of Couscous with Roasted Vegetables.  For each cup of dry couscous you are cooking, use 1 1/2 cups of water or stock.  Bring the water or stock to a boil in a pan, add 1 tablespoon of butter, if you like.  Pour in the couscous, stir, remove from heat and cover with a lid.  Let it sit for 5 minutes.  Fluff with a fork. I squeezed in juice of a lemon and tossed in 2 tablespoons fresh chopped parsley along with my vegetables.  
I used fresh green beans, red, yellow and green peppers, green and yellow zucchini and carrots.  The vegan likes his veggies chunky so that's how I made them,  he feels like he is eating more that way, go figure.  Drizzle a little olive oil onto a baking sheet, toss on the veggies, drizzle with a little more olive oil, 2 cloves chopped garlic, salt, pepper, oregano and fresh parsley.  Bake in a preheated 400 degree oven for 20 -25 minutes.
My couscous is done and tossed with my vegetables.  It was so delicious, the vegan asked if there was any leftover for his midnight snack, was he joking?  There wasn't any of this leftover!


Thursday, October 8, 2015

Holy Moly It's Homemade Ravioli!

I was getting antsy the other day, I had to do something with myself.  I can't stand sitting around doing nothing, I have to be moving.  I remembered that I had a lot of pasta sheets leftover, from our Italian Pasta Night Party, that my daughter made. I had it stored in the freezer, was going to make ravioli, because I already had the ricotta, I just got busy with other things around the house.  So, I got moving  in the kitchen making the ravioli and lots of it!

I love ravioli, put anything between two pasta sheets and make a pillow out of it and I am in!  Sauce it with a variety of things and I am all over it.  It takes only a few minutes for it to cook, and you have a delicious, comforting meal. Check out the recipe for the pasta posted on this blog 6/18/14.
Recipe below for the Ricotta Filling.
To print recipe, click on it, highlight and print.
To view photos in a larger format, click on them.

I pulled together my ricotta filling first.  
Ricotta Cheese Filling
2 lb. container Whole Milk Ricotta Cheese, you could also use part skim milk ricotta
4 eggs
1/2 cup grated Parmesan cheese
1/2 cup grated mixed Italian cheese blend
1/4 cup fresh chopped parsley
1 tsp salt
1/4 tsp black pepper
Ricotta in the bowl, then the eggs.
Add the cheeses, parsley, salt and pepper and stir to combine.
On to the pasta - Lightly dust a large surface with flour, I used a large cutting board.  Lay out two similar sized sheets of pasta dough, mine were around the length to make three ravioli out of them.
Place 1 tablespoon of ricotta mixture spaced evenly onto the bottom sheet of pasta, lightly dab around the cheese with a little water to help with sealing them.  Then place the top sheet of pasta on top.  Use a big ravioli cutter to press into shape, or you can cut them by hand.
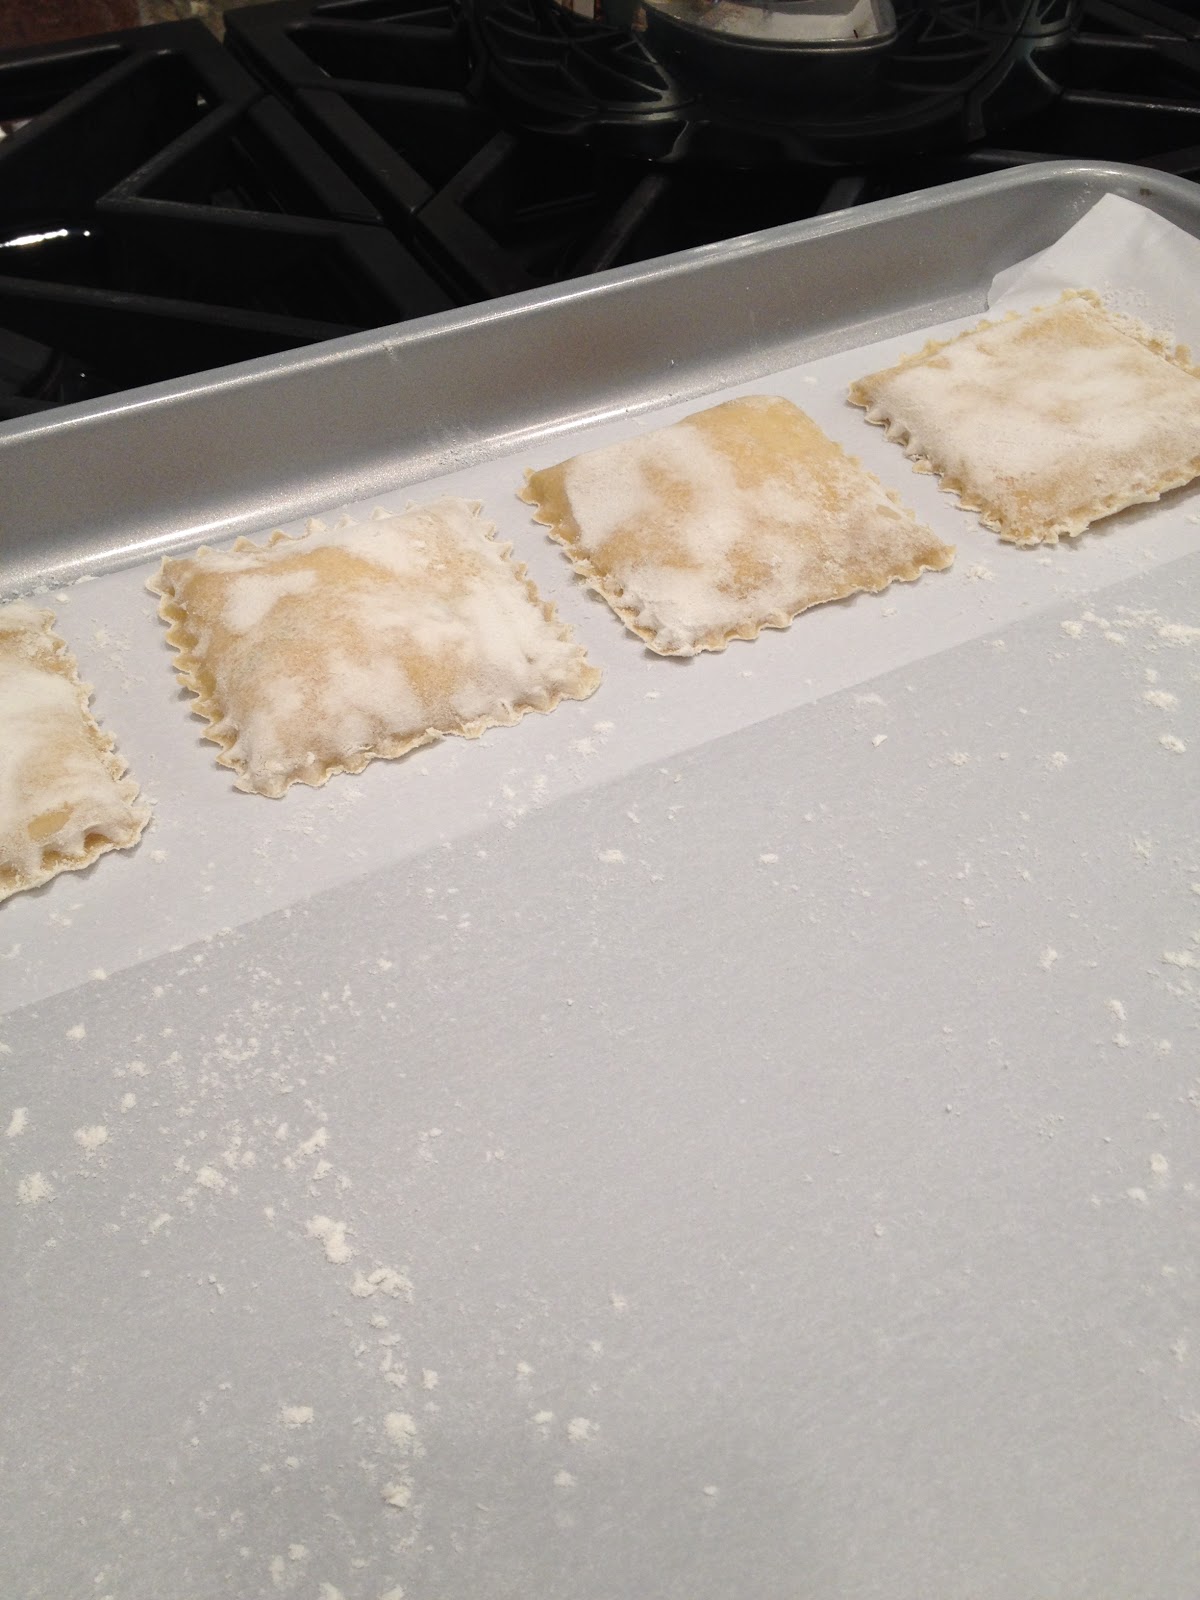
I lined baking sheets with parchment paper and dusted them lightly with flour so the ravioli doesn't stick.
I have two ravioli cutters so I made big and small ravioli.  Use a smaller amount of cheese filling with a smaller ravioli cutter.
Perfect little pillows of pasta and cheese!  I froze my ravioli in single layers on the sheets because I was not using them right away, then placed them in a resealable plastic bag.  To cook them, bring a pot of salted water to a boil, toss them in, cook until they float to the top and they are done.  Serve with your favorite sauce.  A few of my favorite sauces are - red marinara, creamy alfredo, creamy mushroom, garlic and olive oil with herbs and pesto.
I served mine with my favorite store bought pesto from Costco.  I do make fresh pesto, but basil season is gone and it's too expensive to buy it and make it from scratch.  This pesto I think is the best on the market.  Do not heat the pesto sauce, I take mine out of the fridge when I get my water going on the stove, to take the chill off of it.  I scoop as much as I think I need into a bowl and let it sit at room temperature, it will also heat through once you top the ravioli with it.
 Start a large pot of salted water on the stove, bring to a boil, drop in the ravioli, you will know when they are done because they float to the top of the water.  Stir them gently as the are cooking so they don't stick.
 Drain and top with sauce and you have delicious Homemade Ravioli with Pesto coming your way!


Wednesday, October 7, 2015

Winner Chicken - Cheesy Herbed Chicken Breasts

As I've said before, we eat a lot of chicken in this house.  There are so many ways to make chicken as opposed to beef.  I took two large chicken breasts out for dinner last night, I didn't know if my oldest son was going to eat, and my younger son is vegan so I knew he wouldn't eat it.  If I had any leftovers the hubby would take them for lunch the next day, no worries about wasting food there.

My mind was going full speed ahead, what to make with these chicken breasts?  Opened the pantry, nothing in there, opened the fridge, hummm cheese!, that's always good.  Opened up my spice drawer and right on top were Herbes de Provence, love those!  So here you have my concoction of Cheesy Herbed Chicken Breasts.
They were tasty, juicy and the house smelled amazing while they were cooking, on top of the stove by the way.  Nothing fancy to prepare, no fancy way of cooking them, easy peasy

I buy the big bags of grated cheese at BJ's (we use alot of cheese) and the Herbes de Provence, I got a big jar of these at Home Goods, but any grocery store usually has them. I always have an opened jar and a backup jar (use alot of this too).  Herbes de Provence are a mix of garlic, fennel, thyme, rosemary, oregano, basil, marjoram, lavender, parsley, sea salt and lemon peel. Now you can see why the house smells so good while they are cooking!
 I rinse and pat my chicken dry.  Heat 2 tablespoons of extra virgin olive oil over medium high heat.  Sprinkle each chicken breast with a teaspoon of Herbes de Provence and 1 tablespoon of grated Parmesan cheese. Place chicken in the pan seasoned side up.  Cover and cook for about 8 minutes, reduce heat to medium, flip the chicken over and cook for another 8 minutes. Now, depending on the size of the chicken breasts cooking time will differ.  Chicken is done when the juices run clear. 
 Nicely browned and ready to be.....
 ......plated and served
 I made oven fried russet potatoes with my chicken, my son ate just about the whole plate before I even sat down.  He is a very fussy eater even as an adult, and asked me how I made them "they were so good".  Wash and cut 3 russet potatoes, drizzle about 2 tablespoons of extra virgin olive oil onto a baking sheet.  Throw the potatoes on, toss potatoes with garlic powder, salt and pepper, roast in the oven at 375 degrees for 25 - 30 minutes.  In the last 5 minutes, under the broiler to crisp them even more, watch them so they do not burn.
 And, I made an Asian salad as a side dish - Napa cabbage, cilantro, carrots, cucumbers, mandarin oranges, crispy noodles, black and white sesame seeds with a ginger and soy dressing.
 I got the portion control plate, because there was nothing left by the time I got to the table! Good thing I made the salad.  Oh well, as least they enjoyed it.