Saturday, December 7, 2013

Get Those Last Minute Deals!

I went to a couple of my local stores this past week and picked up some last minute deals.  A lot of the stores are already setting things up for 50% off!  You can't pass that up, who doesn't like saving especially this time of year.  Check out what I found...

Dollar Tree BIG gift bags, they have tons and tons of bags in all shapes and sizes, AND they are cute!  Lots of glittery ones, because you know I love sparkle and shine.  I also found this glitter dot tissue paper, they had them in so many colors.  Of course all are $1.00.
 This printed burlap Santa bag I found in Home Goods, it's another great store.  I am going to fill a plastic trash bag with newspaper (so it doesn't get wet) and tie with a big bow around my lamp post outside.  The towels are from Kohl's at 50% off, the reindeer has a little jingle bell on it.
 I used this little feather wreath with a votive cup and candle, from Kohl's and also 50% off.
 More sugars and jimmies for the Cookie Party.  Gold and white sugar mixed and gingerbread men and white jimmies mixed.  Square paper baking cups (25) with Christmas motif, instead of the regular old round ones for something different, all at Home Goods.  Check them out for baking needs, a great store, with unique items and inexpensive.

Friday, December 6, 2013

Christmas Swags

I had a lot of fresh greens that were cut off the bottom of my tree, because it was so full, so I saved them.  My sister gave me ring, and said she wanted to put something nice on our mothers gravesite, so I sprung into action.  All those places that sell these type of swags are expensive.  I had past experience in making them so I told her I would make it, instead of buying one.  My daughter (the wonderful bow maker) had already made me two red velvet bows that I did not use, so I had them already. I went into the garage and started cutting and shaping my swag.  I wanted to dress it up a little bit, so I cut some fresh Cedar branches from my trees out in the front of my house. I placed Fraser fir branches on the bottom and then Cedar branches on top, wired it in the center to secure both sides together, and then attached both bows together in the center of the swag.  Also, made a loop in the back for hanging or securing with a stake.  BEAUTIFUL!  Whether you use them for your windows or for a gravesite, these are easy to make, took me less than 10 minutes to put this together, and it's pretty.

Thursday, December 5, 2013

The Dreaded Christmas Lights!

I don't know anyone who loves this job, the Christmas tree lights, they are awful to do every year.  You roll them up nicely to use the following year, and somehow they still become a tangled mess when you go to put them on the tree! AND, not only that, half of them don't work!  So my work began on Sunday, it took me 3 hours, yes that's right, 3 hours to untangle and try to fix burned out lights.  I got about half of the 8 strands working and then threw in the towel and just bought new ones.
 Tree is up and decorated, YAY!
 This is the first year I have used white and colored lights, I LOVE IT! I am still pulling leaves out of this tree, don't look at the mess on the floor.
 These are a few of my favorite tree decorations.  I have this tree in my family room, it is almost all snowmen that I have collected over the years.  The Snowmobile is hand blown glass.  If I use anything other than snowmen I try to use unique ornaments, like this little guy in a space ship that is all hand blown glass.  I have a smaller artificial tree in the dining room that is all Santas. 
A co-worker gave me this snowman in a hand blown globe, the little guy in the sled is a new addition.
 Hand blown kitty cat is representin' our "cats in the house".  Glittery dirty snowman, I love dirty snowmen.
 My WOOLYS, I love them too!
 These 4 Christmas Balls are all antique, hand blown ornaments, that were my grandmothers or my mothers.  I try to be very careful with these, I have had some disintegrate in my hands because they were so old.  Paint and glitter are worn off or tarnished, but I don't care, I still put them out every year.  When I look at these ornaments, they remind me of both of them and Christmases past.


Wednesday, December 4, 2013

A Few Last Minute Christmas Decorations

I found these two reindeer table runners at the Christmas Tree Shop.  The red one has rhinestones on it and the tan one has tiny jingle bells on the holly leaves, both are burlap and are so cute!

 Mini mitten lights, 10 on a string, also at Christmas Tree Shop.
 Frosted (waxed) printed tissue sheets $1, is used for baked goods, you know to put into a container of cookies or for wrapping food items.  Printed tissue paper $1, for wrapping gifts.  Both at Christmas Tree Shop.
 I found a new use for these Scentsicles that you hang on artificial trees to get the scent of a real tree.  I use them as air freshners in the bathroom.  I hung them on the towel bar, no one noticed they were even there, but said how nice the bathroom smelled.  They come in different scents, not all pine scented.  I found these at Michael's, but Home Depot and Lowe's sell them too.
 Silver shimmery table cover on sale at Target.  I will use for the tablescape for my cookie party.  And, I made this little hurricane for $2.00, all from WalMart.


Tuesday, December 3, 2013

Baby It's Cold Outside...

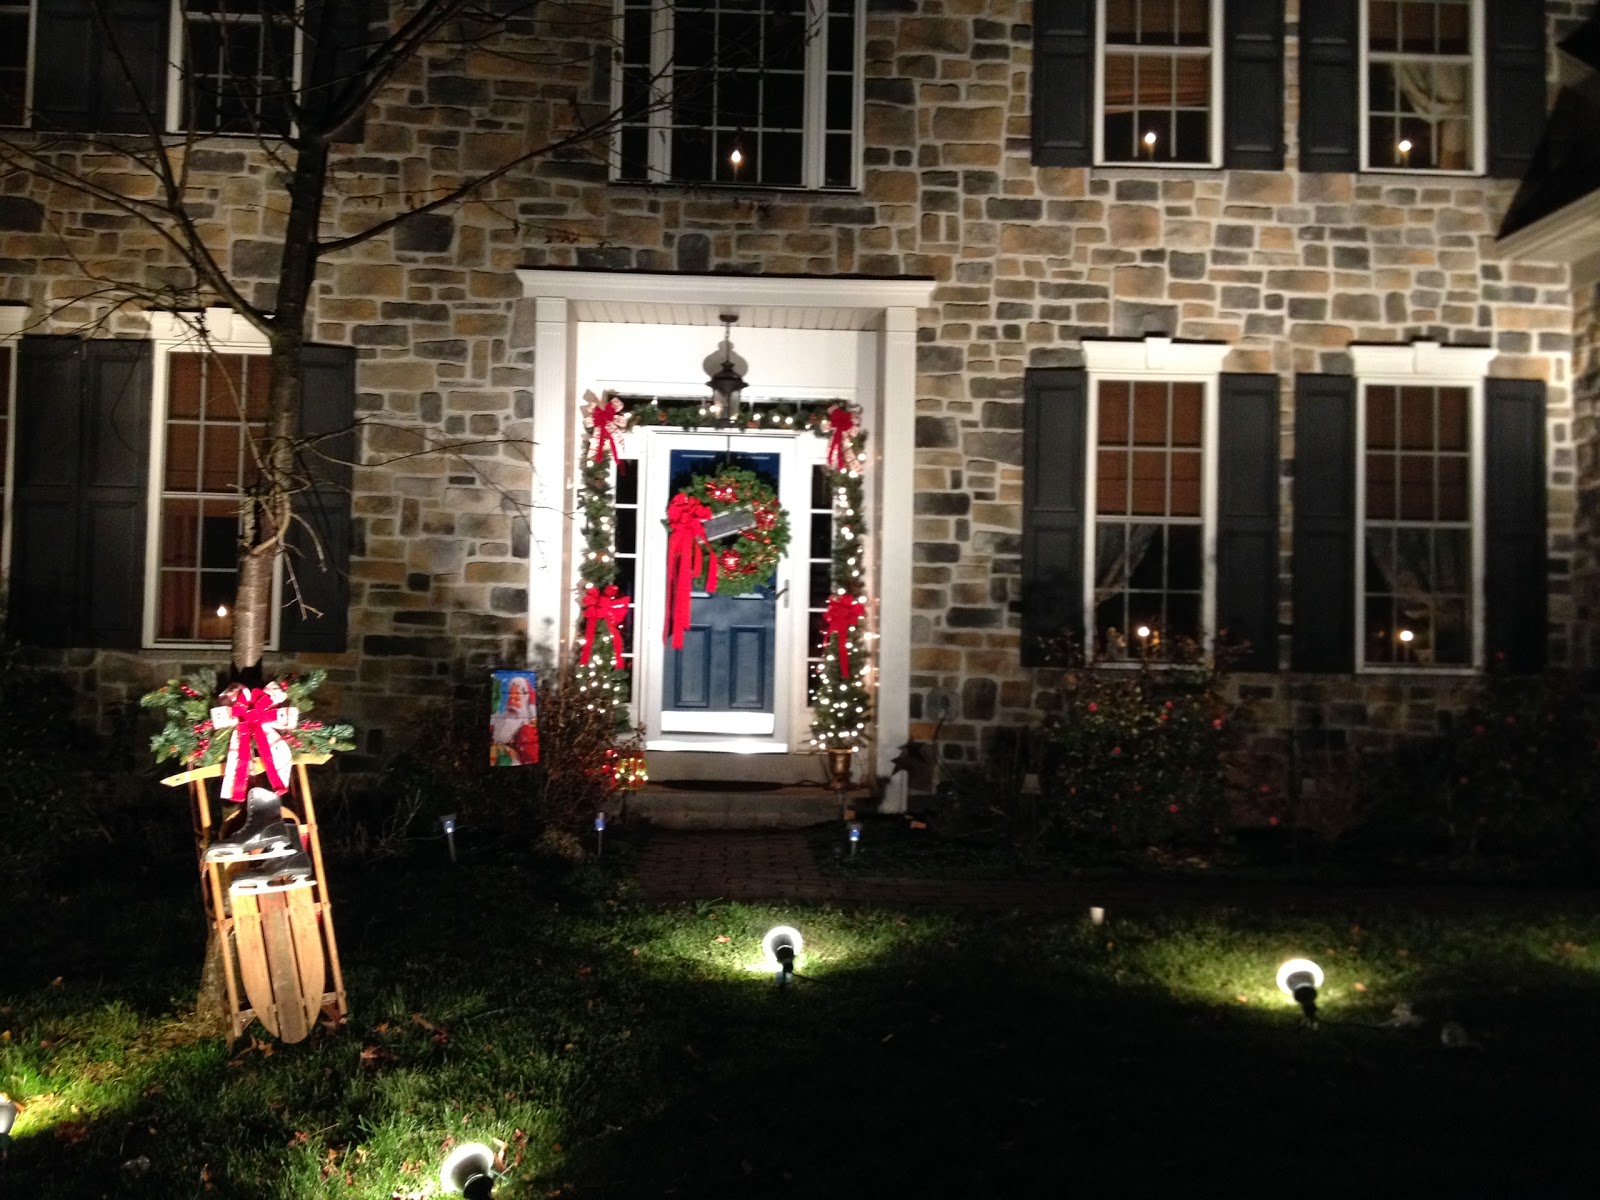
Well, I finally got the outside decorated for the Holidays, yahoo!  Just in the nick of time, the freezing weather has finally arrived.  It didn't take me long, maybe an hour and a half, not too bad, considering I was doing it all by myself.  I usually put swags on the windows, but it's such a chore so I nixed them this year and just did around the door, candles are always in the windows, and the sled and skates that my sister so nicely lent me.   In the past my daughter and I use to hand make all of the window swags, talk about C-R-A-Z-Y, outside, in the cold weather!  I put a stop to that and started using artificial greens.  They make so many nice ones now, mine even have pine cones on them.  My window candles are all on one light switch, so no running around turning everything on and off, and no timers for every candle.  Now on to the tree, a 15 footer, going to need a lot of lights! 
My daughter makes all the bows by hand.  The 4 foot little trees in pots are from Big Lots and came pre - lit.
 I made the tray chalkboard sign for the wreath and attached it with floral wire, all the other decorations came from WalMart.
Got the tree up, and look at that mess on the floor!  A lot of leaves on the branches, have to be careful and clean them all out.  It's a beauty though, Fraser Firs are my favorite tree because you can smell them all the time and they smell so good!  Stay tuned for the decorating of the tree.


Monday, December 2, 2013

This Is No Red Hot Chili....It's Mild!

We love Chili in my house, but I only make it a couple of times a year, mostly when it's cold outside.  Chili warms your bones, just like soup.  I am not a fan of all things hot, I like foods a little spicy but not so hot that you can't eat it.  I have been making my version of Chili for a lot of years, and yesterday sent my youngest daughter back to college with a nice bowl in her care package from home.  She had it for dinner and told me it was awesome!

Some of the ingredients, and the ground beef cooking up in olive oil, with salt, pepper and garlic powder.
 My trusty Pampered Chef meat separator/masher
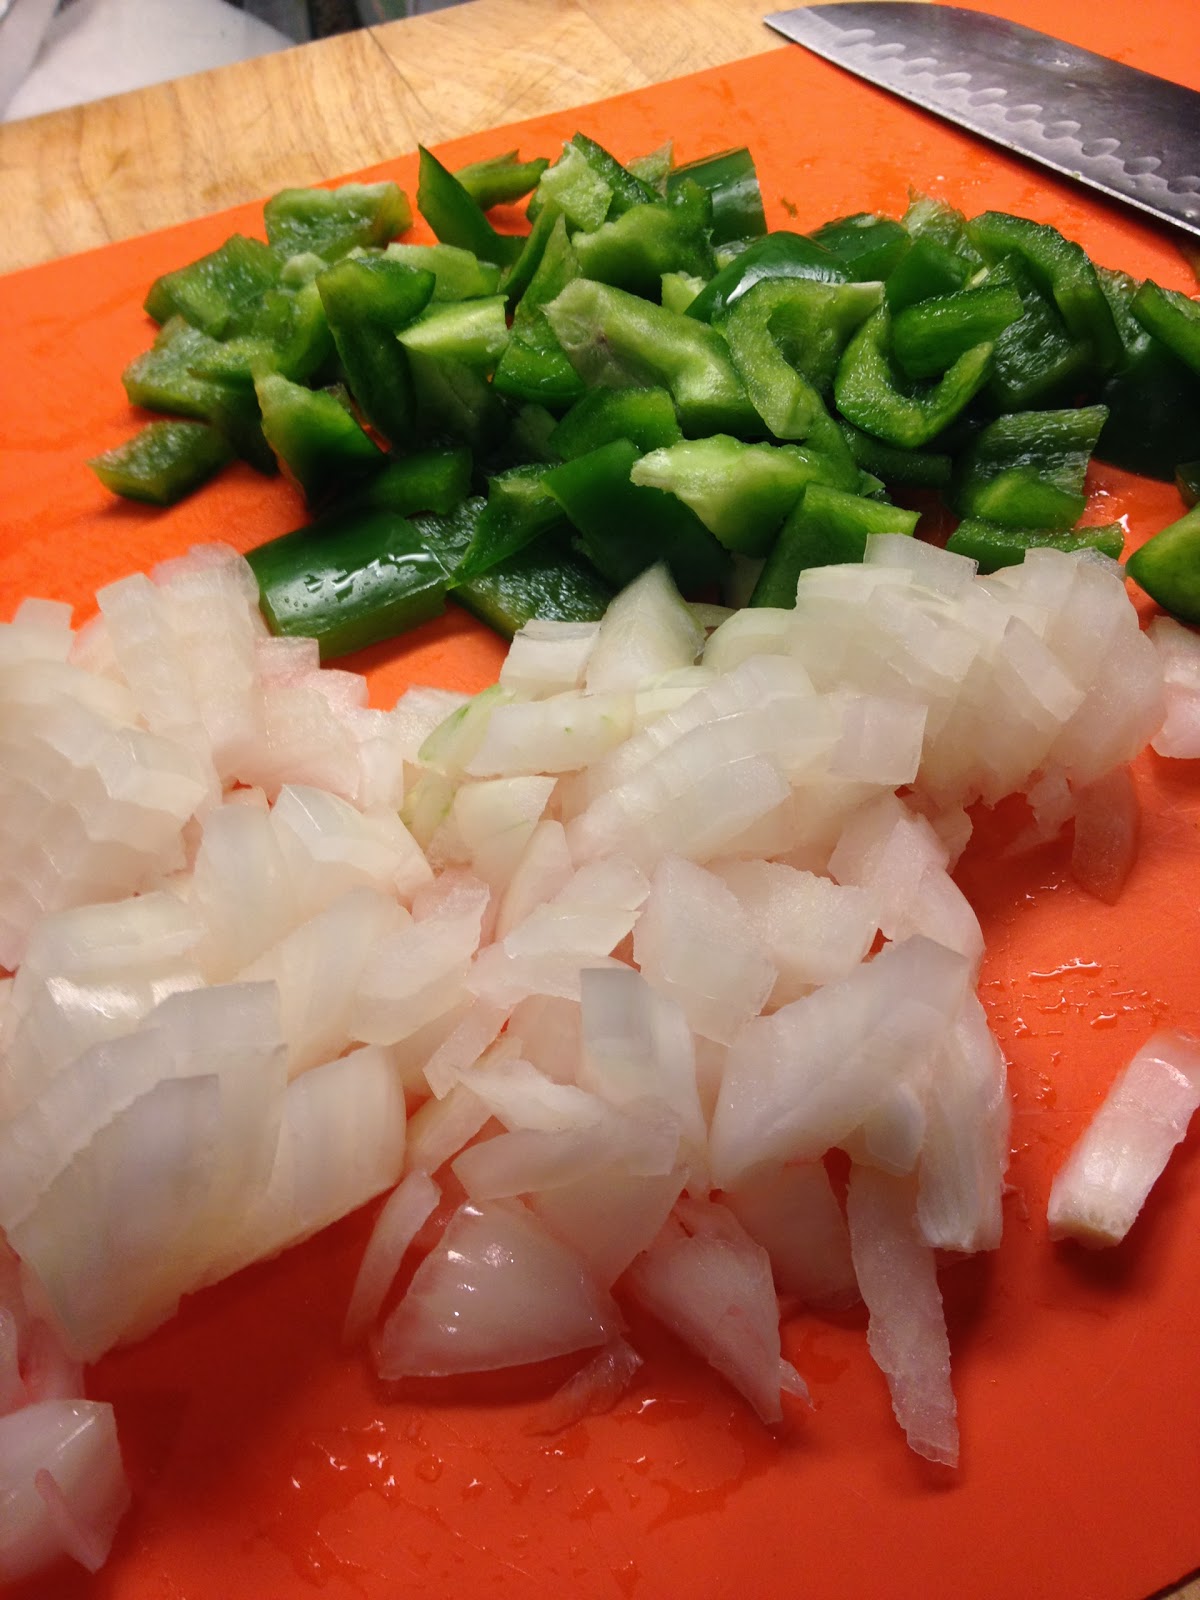
 This is how it works, as the meat is cooking, spin the tool to separate and mash the meat.  Chop the onion and green bell pepper.
 Add onion and green pepper to the meat with the seasoning.
 All done and ready to eat.  Top with shredded sharp cheddar cheese, diced onion, sour cream and cilantro if you like.
Mild Chili

2 Tbsp olive oil
2 lbs. lean ground beef
1 tsp salt
1/2 tsp black pepper
2 tsp garlic powder
1 large onion
1 large green bell pepper
2 tsp crushed red pepper flakes
1 envelope of McCormick's Mild Low-Salt Chili Seasoning
1 - 14 oz can of diced tomatoes, use this can for 3 cans of water to add to the pot
2 - 6 oz cans of tomato paste
2 - 15 oz cans red kidney beans, drained but not washed

Heat the olive oil over medium high heat.  Add the ground meat, season with the salt, pepper and garlic powder, and break up the meat as you are cooking it.  When the meat is no longer pink add the onion and green pepper, continue to cook until they are tender. Reduce the heat to medium, add the pepper flakes and the envelope of seasoning mix and stir all together.  Add the diced tomatoes, 3 cans of water and tomato paste. Stir until all is combined, then add the kidney beans.  Cover with a lid and cook for 2 hours stirring occasionally.  Before serving top with  grated sharp cheddar cheese, sour cream, diced onion and cilantro.  Makes 6 servings.


Sunday, December 1, 2013

Broccoli and Cauliflower Casserole

My gears were going, I was looking for something different for a vegetable side dish for Thanksgiving.  Corn is always a side dish, that's a given, and I always make my roasted green beans which are delicious.  This year I wanted to make something other than plain old peas or carrots, and decided on broccoli and cauliflower.  But, how to make it so the kids would eat it was another trick to pull off.  I wanted it creamy and cheesy, so went to the pantry and the fridge and pulled out mushroom soup and cheddar cheese.  And, to add a little crunch, because they always like that, I used bread crumbs to top the casserole with.  Well, let me tell you they loved it! My sister doesn't even like cauliflower and she ate. This is how I made it.

A few of the ingredients to pull off my casserole.
Topped with the creamy sauce and cheese and into the oven it goes.  Bake it, then top with the breadcrumbs for a very tasty casserole.  It's almost a meal in itself.
Creamy Cheddar Broccoli and Cauliflower

2 heads of fresh broccoli
1 head of cauliflower
1 block of Cracker Barrel Sharp Cheddar Cheese, grated
2 cans of Campbell's low salt cream of mushroom soup
1/4 cup of of Hellmann's Light Mayonnaise
1 cup of seasoned bread crumbs
5 tablespoons of melted butter

Preheat the oven to 350 degrees. Clean and cut the broccoli and cauliflower into florets.  Arrange them in the bottom of a 9 x 13 baking dish. Mix the 2 cans of soup with the mayo.  Stir in 1 1/2 cups of the grated cheese.  Bake in the oven for 40 minutes.  Mix the bread crumbs with the melted butter.  Top the casserole with the breadcrumbs and bake for another 15 minutes or until breadcrumbs are browned.  Leave the casserole in the oven and turn it off.  Sprinkle the other 1/2 cup of cheese that is left, over the top.  Remove from oven when the cheese is melted and serve.  Makes 8 - 10 servings.